As part of my formation in programming sciences, I had the opportunity to build a little Tetris game with C# on Unity and I thought it could be a good idea to write a little blog post about my experience. Plus, it changes a little from CSS things.
Why Tetris? Well first, it’s a pretty classic game which doesn’t need a good design layer to be fun to play. Plus, the logic behind the game is simple enough to start, but there are still some difficulties which are very interesting to learn from.
As a reminder:
- Unity: Unity is a cross-platform game engine and IDE developed by Unity Technologies, targeting web plugins, desktop platforms and mobile devices.
- C#: C# is a programming language developed by Microsoft within its .NET initiative and later approved as a standard by ECMA and ISO.
If you don’t care about how I built this up and simply want to give it a try, please refer to the last section at the bottom of the article. Have fun! ;)
The making of
Neuron Tetris
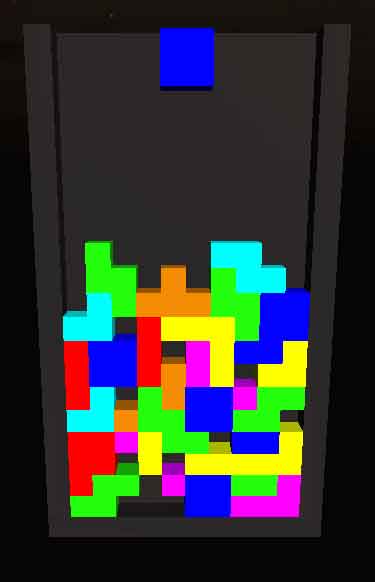
Before doing any code, I had the “how the hell am I supposed to do this?” moment. I had to think about the process behind the program, the way it would work. This is what I started with:
- Instantiate a random brick
- Allow move and rotate on the current brick
- Stop the brick when its bottom hits another brick or the floor
- Destroy complete lines
- Goto(1);
Even if I’m clearly not a good C# developer neither I’m a Unity ninja, I was pretty confident with the making of this game. Given the process above, I thought it would be fairly easy to do. Boy, I was wrong. It’s been rough. Let’s see why!
When things go wrong
Collision detection
There are a few things that were really not easy to do with my current skills and knowledge of both the language and the program but one was really above all: collision detection. What a bitch.
Basically, I wanted to:
- prevent the brick from crossing left and right edges of the frame
- prevent the brick from crossing another brick
- stop the brick when hitting either the floor or another brick
At a first glance, it seems easy, especially when you know Unity engine implements a collision detection system. To put it simple, the collision detection module from Unity permanently checks if something is touching your current item. If there is, it returns the item touching it, else it returns false.
First problem: how to distinguish bottom collisions from side collisions? Because this isn’t the same thing. If you detect a collision on the bottom, you have to make the brick stop moving, and if you detect a collision on a side, you have to prevent the user to move the brick on this side.
I’ve spend hours trying to make it work with no success, so I ended using a completely different approach: rays. To put it simple, you can cast an invisible ray from the center of an item in the direction you want and to the distance you want. From there, it returns you a boolean: there is something or there is not.
So what I did was casting rays in 3 direction (left, bottom, right) at a very short distance. If the ray returns something on a side, I prevent the brick from moving on this side. If there is something below, I stop the brick and instantiate a new one. It seems to work well.
Brick positioning
Another problem of mine was placing the bricks correctly. During the first phase of testing, bricks were slightly overlapping each other (see figure). Not much, but enough to be seen and to involve some line destroying issues.
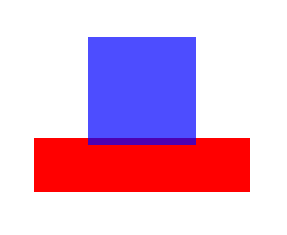
This was caused by the collision detection problem. Because whatever the method I could use (rays, OnCollisionEnter, OnTriggerEnter, …), the brick wasn’t stopped at the right position. It was always “more or less” where it should have ended. This lack of accuracy was problematic.
I ended doing something I didn’t want to, but I had no choice: brick repositioning after landing. Basically, it means when a brick stops moving, I round up its coordinates to place it where it should have ended. It’s not great, it involves some calculations, but I couldn’t think of any other option to fix this issue.
Brick rotation
When I started coding, I was expecting the brick rotation to be very simple. In some way, I wasn’t wrong: make the brick rotate on itself is the easy part. When pressing top or bottom arrow, the brick makes a 90° rotation clockwise or counter-clockwise, no problem.

What was much harder however was prevent the rotation when too close to the wall. Rotating a red bar near the wall could mean wedging the bar into the wall. I succeded in preventing the rotation when too close to the wall, however there is still a bug with the purple L brick which cannot rotate when placed at a 1-unit gap from the wall. Sadly, I don’t know how to fix it.
The other big problem I had and still have with brick rotation is rotating near another brick. Unlike the walls, there is no restriction for rotating a brick near another one, meaning you can overlap bricks with this method. In most cases, this bug won’t be noticed because the common behavior when playing Tetris is rotating and moving the brick while falling, not moving the brick at the very last moment of its fall. Still, there is a bug I couldn’t fix.
Let’s make improvements
Once I figured out how to fix most of the previously seen problems, it was time to do some improvements to make the game enjoyable. This includes increasing difficulty overtime, displaying the next brick, showing the score, having a main screen, allow pause, and so on. Actually, it’s kind of all the features. Making the game work is the hard part, but making the game cool is very important as well.
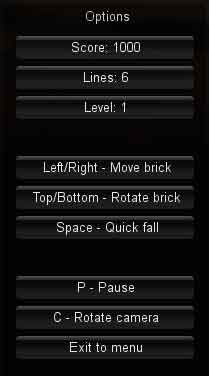
Score
Showing the score was very easy to do. Basically, everytime a brick is spawned a score variable is incremented by 10 points. When a line is destroyed, the score variable gains 100 points. What was a little harder was displaying the score on the main screen once you lose the game. (This makes me notice I forgot to reset the number of lines when playing again. :x)
On Unity, when you want to do various “levels”, you have to create multiple scenes. Like you would do in Flash if you know what I mean. So in our case, the main menu is a scene, and the game is another one. Problem is, objects in a scene are not accessible from another scene by default, so I had to do some trickery.
Difficulty
To increase the difficulty over time, I had multiple options:
- The Classic Tetris way: you have to do X lines to change level. Each level is faster than the previous one. However, it would have required me to do multiple scenes which would have pissed me off, so it was not an option to me.
- Increase speed over time since game start: it didn’t seem very accurate to me since; the difficulty has to go higher when you can stand it, not when you’re struggling to place your bricks.
- Increase speed over score: something like
speed = score / 100or I don’t know. Same reason as above. - Increase speed over completed lines: every time a line is completed, the speed increases.
So I decided to increase speed every time you complete a line. Not much, so you don’t notice it, but progressively, you’re starting to feel it. This option seems great to me because it increases speed only when you’re winning without requiring any other scene breaking the game flow.
From there, displaying some kind of level was only a math concern. The result is you’re passing a level every 10 lines. I think it’s pretty accurate regarding the Classic Tetris.
Rotating camera
An interesting point of making a game on Unity is you’re using 3D. You can choose to ignore it, but I feel like it can be a plus to the game when used correctly (which is not the case in this game :D). I wanted to try slowly moving the camera during the game to increase difficulty. Hopefully, I didn’t have to struggle with quaternion calculations for rotation concerns since I managed to do everything directly in the IDE with default animations.
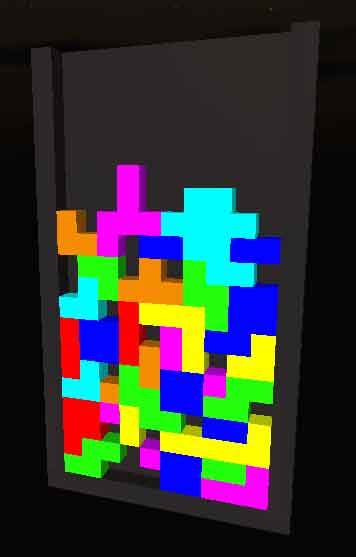
It was pretty easy to do, however I felt like it could be really annoying for some people (including me) to have the camera moving permanently so I simply added an option to enable/disable it. The C key in game, as in camera. True story.
About the game
Features
- Classic tetris gameplay
- 3D view
- Score + number of lines
- Kind of levels with speed increase
- Quick fall while pressing space
- Preview of next brick
- Pause
- Rotating camera
- Epic 8-bit Tetris soundtrack
What’s next?
I don’t know yet if I’m going to continue this game, but I think it’s a good start, so I may try to improve it in a not so far future. I have a few plans to make it nicer, including:
- Fixing the brick rotation bugs
- Fixing the number of lines bug
- Improving the design layer
- Hiding the game when paused
- Giving the ability to disable music
- Improving performances
- Making it run on mobile
My best score is 9840 points, level 7 I guess.