While I was looking for a job earlier this year, I worked on ProMe (pronounced “pro-may”), a companion app for the solo TTRPG called “The Protector’s Memories”, created by Enzo Salviato.
What started as a quick and dirty little tool to help me generate NPCs turned into a fully fledged website progressive web app that I’m happy to finally talk about. TPM is a relatively recent game (2025), and solo RPGs are rather niche, so I don’t expect many people to use this site. Still, I wanted to write about my experience building it, and highlight some cool things I’ve done and learned along the way.
If you just want to check out the website, here goes: prome.games. The landing page, and the biome pages are the most cinematic pages, and I recommend checking them out on a desktop browser to fully appreciate the theming and imagery.

About The Protector’s Memories
The Protector’s Memories is a niche little gem in the world of TTRPGs. For starters, it is a solo RPG. You just cannot play it with other players, it’s not designed this way. It’s a game where you sit, you explore, and you lose yourself in your own imagination.
If you’re into role-playing games, you should try it. Depending on what you’re used to, it may hit the spot, or it may be a nice discovery!
And if you’re not into role-playing games, you should try it! It’s very easy to pick up, it needs no prior gaming experience, it has no strict goal, and the rules are rather thin and permissive. If you’re thinking DnD, then you’re totally off-mark — it ain’t that.
TPM is based on exploration and discovery before anything else, so there is very little combat, and while magic is present, it is rather subtle. Your goal is to wander and wonder, help dwellers, discover lost landscapes and try to better the world around you.
The game costs about €£$20–25 and can be learned within an hour, so I really encourage you to give it a go.
Tech Stack
I wanted to get started quick, and I wanted to code some things myself (and not vibe-code the whole thing), so I picked a stack I’m mostly familiar with:
- Framework: Next.js
- Internationalization: next-intl
- Styling: plain ol’ CSS (actually a lot of new CSS)
- Components: Ant Design
- PWA: Serwist
- Hosting: Netlify and R2 for sound files
- Authentication: Netlify Identity
- Storage: local storage first, and Netlify DB (Neon) for user accounts
Ant Design: a love-hate relationship
If you’re not familiar, Ant Design is a design system and React component library. It’s rather rich, with a lot of very well crafted components. Overall it works well, you can put things together quickly, and it remains decently customizable. I’ve used Ant in the past for personal apps and dashboards because it looks clean, and it provides most components you’ll ever need, including tricky ones like toasts, popups and notifications. It has a lot to offer.
For good or for bad, I went with Ant Design again. On the bright side, it got me started quickly and AI agents were able to consume its documentation to put together interfaces fairly successfully. It offers an easy way to override the whole default theme via its token-based design system, it comes with dark-mode support out of the box, and its <Form> component is truly excellent — all things I leveraged.
Now, Ant Design also has some very weird quirks. For instance:
- Overriding styles can be grueling. They use classes for everything, and they nest class selectors quite deeply, leading to relatively high specificity. This leads you to fight that with more specificity or
!importanthammers. They also apply a lot of their styles via CSS custom properties, and a lot of them are hard-coded, which means you never know whether you’re supposed to override the property itself, or find whatever custom property they defined. - Their layout suggestions rely on their
<Menu>component which is a fairly solid implementation of whatrole="menu"is for: a grouping of actions or functions that require complexity, akin to menus in desktop applications. I remain unconvinced this is an appropriate component for a website navigation, and the fact is that they do not provide any component or recipe for a website navigation, so you either use that bazooka<Menu>or you build your own (I’ve done one then the other). - They have some severe outstanding accessibility issues. For instance, their
<Popover>and<Popconfirm>components which are very common and thus (I can only assume) very used are simply not usable with the keyboard. - They have some weird internal design decisions: in version 5, they deprecated their
<List>component hinting at a newer and better component to replace it, except they never shipped it, so you get unactionable deprecation notices which is kind of a no-no in API design.
All in all, a mixed bag. I think it made me faster overall, but I’ve also certainly wasted a lot of time fighting the framework.
Progressive Web App
Believe it or not, this is my first time building a PWA. I played with some of the underlying concepts before, but this time I tried to do it properly and fully. What motivated me was that my storage layer relied exclusively on local storage, which meant I had a good shot at building something with great offline support.
For that part, I’ve used Serwist, a toolkit for service workers. I’ve integrated it to my Next.js project following Building Offline Apps with Next.js and Serwist by an engineer called Chris.
I’ve subsequently browsed through What PWA Can Do Today to see what other cool features I could integrate:
- Quite obviously: installing to home screen, which is at the core of progressive web apps.
- Vibrations on key game events, using the Vibration API.
- Auto-playing ambient soundtrack (based on an opt-in setting).
- OS-level audio playback with the Media Session API.
I’ve also played with shortcuts, native view transitions and notifications but they didn’t make their way to the final website for various reasons.
Nerdy Design Details
I’ve really just been having fun with this project, so I got to spend some time on design details that are not super important in the grand scheme of things. I want to dig into a few noteworthy parts.
Colorful Biomes
The game has this concept of “biomes,” of which there are 6. Think of them as different environments: you have your forest, and your desert, and your jungle, and so on. It felt rather natural to associate a color to each biome. After all, that’s how I played the game on paper: roll a die, pick a biome, color the map with pencils.
I’ve defined two colors for each biome: a light and a dark one. And I’ve defined a CSS property for each. Like this:
:root {
	--biome-prairieSea-light: #7dc8a0;
	--biome-prairieSea-dark: #4a9f72;
	--biome-shadowWoods-light: #a793c3;
	--biome-shadowWoods-dark: #57446f;
	--biome-mushroomJungle-light: #ae9178;
	--biome-mushroomJungle-dark: #624838;
	--biome-sunkenSavannah-light: #5ec4e8;
	--biome-sunkenSavannah-dark: #1a6f94;
	--biome-silentWastes-light: #f3d58e;
	--biome-silentWastes-dark: #af8c43;
	--biome-titanGardens-light: #ffb3a7;
	--biome-titanGardens-dark: #a64b3c;
}
But I didn’t want to have to create a bunch of variants every time a component can be “biome-themed”. So what I’ve done is create two generic --biome-light and --biome-dark properties, whose value change depending on their ancestor. Like this for instance:
[data-biome="prairieSea"] {
	--biome-light: var(--biome-prairieSea-light);
	--biome-dark: var(--biome-prairieSea-dark);
}
This way, I can use --biome-light and --biome-dark in my generic components, and assigning the data-biome attribute to any ancestor will automatically feed the right colors to the component.
Hexagonal Map
The game uses a map of hexagons. There is something genuinely cool about hexagonal grids. I grew up playing Heroes of Might and Magic III and its legendary hex battle map.
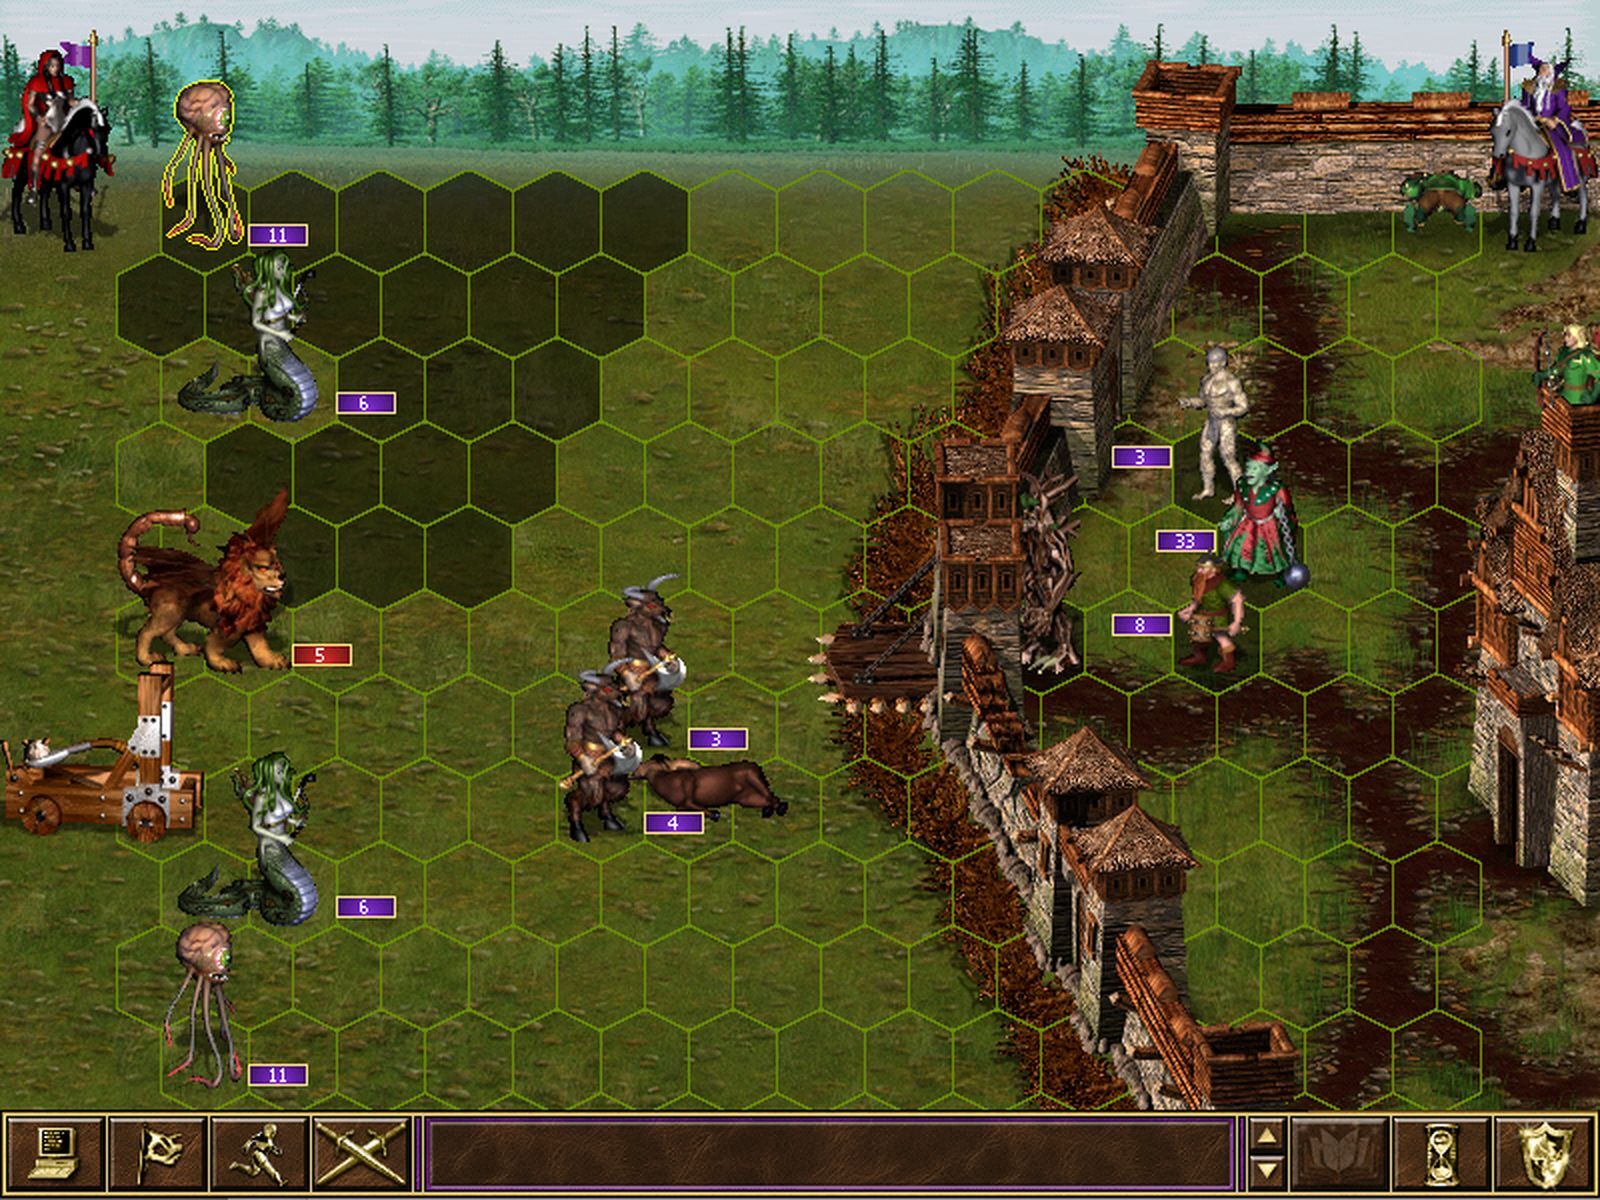
When I started working on this project, I knew I wanted the map to look fresh and inviting, because the game is ultimately about exploring and wandering the world.
The thing is hexagons are not a very “natural” shape for the web. Fortunately, Temani Afif wrote about building a Responsive Hexagon Grid Using Modern CSS which I heavily borrowed from. It looks a little like this:
What’s nice about this approach is that it just uses the DOM, so we don’t need math to figure out which hexagon is being hovered or anything. Also the outline property follows the contours of the hexagons nicely. If you’re using a mouse, try hovering a hexagon!
Unfortunately, support for corner-shape: bevel isn’t great. It currently sits at around 69%, with no support in either Firefox or Safari. For these, I’ve used CSS @supports to detect lack of support for corner-shape: bevel and fall back to a grid of circles. It’s not the same, but it’s usable.
Just using the biome colors felt a bit flat though, so I first added some inner shadow to give a bit of depth.
Then I decided to add patterns to each biome, which had the added perk of helping color-blind people differentiate the various biomes. Kudos to CSS Pattern for their outstanding CSS-only patterns using linear gradients.
I even went a bit nuts and added some perspective to the whole map (behind a setting):
Here is how it looks on the website:

Creative Imagery
My sisters made me discover TPM. So when I started building this website, I naturally showed it to them. One of them offered to help generate imagery using MidJourney, with which she is rather proficient.
Not only was it lovely to work with my sister on this project, but she also did an amazing job with the images. I’ve given her the official biome description from the rulebook, as well as the original illustrations from the book from Enzo Salviato and Natalia Mancio.
From there, she used her creative judgement and proficiency with MidJourney to generate a variety of images. We’ve done several passes on them to find something that worked well on desktop, mobile and felt coherent across biomes. My favorite is the image used for the Titan Gardens biome, which are gigantic gardens where blue whales can float.

Custom Fonts
I’ve spent most of my frontend career trying to avoid using custom fonts as much as possible to make my life easier. But I really wanted to create gorgeous almost poster-like pages for the biomes, and I felt like using a creative font would go a long way in instilling some character.
Next.js provides built-in optimization for Google Fonts. Unfortunately, their integration doesn’t allow for subsetting the font to specific characters (it only allows subsetting a whole script, like latin or cyrillic). This is doable with Google Fonts directly though, using the text= query parameter. For instance:
<link
	href="https://fonts.googleapis.com/css2
		?family=Mountains+of+Christmas:wght@400
		&display=swap
		&text=Titan+Gardens"
	rel="stylesheet">
But because I want to have full offline support, I can’t have an HTTP request going to Google (or any third party for that matter). Also, this request could be a little slow which would really diminish the effect.
So I’ve written a script to subset the font appropriately and download the file. For each biome and its custom font, it creates a URL like the one above, and fetches its content using a modern User-Agent (to get WOFF2). From the response, it extracts the URL to the subsetted WOFF2 file, download it and store it in the public folder. Then it generates a CSS file for the @font-face. You can see the code here.
import { mkdirSync, writeFileSync } from 'node:fs'
import { dirname, join } from 'node:path'
import { fileURLToPath } from 'node:url'
const __dirname = dirname(fileURLToPath(import.meta.url))
const ROOT = join(__dirname, '..')
const FONTS = [
{
biome: 'shadowWoods',
family: 'Caesar Dressing',
file: 'caesar-dressing',
text: 'The Shadow Woods',
},
{
biome: 'mushroomJungle',
family: 'Shizuru',
file: 'shizuru',
text: 'The Mushroom Jungle',
},
{
biome: 'sunkenSavannah',
family: 'Rubik Marker Hatch',
file: 'rubik-marker-hatch',
text: 'The Sunken Savannah',
},
{
biome: 'titanGardens',
family: 'Mountains of Christmas',
file: 'mountains-of-christmas',
text: 'The Titan Garden',
},
{
biome: 'prairieSea',
family: 'Mystery Quest',
file: 'mystery-quest',
text: 'The Prairie Sea',
},
{
biome: 'silentWastes',
family: 'Fredericka the Great',
file: 'fredericka-the-great',
text: 'The Silent Wastes',
},
]
// A modern UA is required: Google Fonts returns WOFF2 only for modern browsers.
const UA =
'Mozilla/5.0 (Macintosh; Intel Mac OS X 10_15_7) AppleWebKit/537.36 (KHTML, like Gecko) Chrome/124.0.0.0 Safari/537.36'
async function fetchGoogleFontsCSS(family, text) {
const url = new URL('https://fonts.googleapis.com/css2')
url.searchParams.set('family', family)
url.searchParams.set('text', [...new Set(text)].join(''))
url.searchParams.set('display', 'swap')
const res = await fetch(url.toString(), { headers: { 'User-Agent': UA } })
if (!res.ok)
throw new Error(</span><span class="token string">Failed to fetch CSS for </span><span class="token interpolation"><span class="token interpolation-punctuation punctuation">${</span>family<span class="token interpolation-punctuation punctuation">}</span></span><span class="token string">: </span><span class="token interpolation"><span class="token interpolation-punctuation punctuation">${</span>res<span class="token punctuation">.</span>status<span class="token interpolation-punctuation punctuation">}</span></span><span class="token template-punctuation string">)
return res.text()
}
function extractWoff2Url(css, family) {
// The Google Fonts API returns URLs with query params (no .woff2 extension),
// followed by format('woff2'). Match the url() before that format hint.
const match = css.match(
/url((https://fonts.gstatic.com/[^)]+))\s+format('woff2')/
)
if (!match)
throw new Error(</span><span class="token string">No WOFF2 URL found in CSS response for </span><span class="token interpolation"><span class="token interpolation-punctuation punctuation">${</span>family<span class="token interpolation-punctuation punctuation">}</span></span><span class="token template-punctuation string">)
return match[1]
}
async function downloadWoff2(url) {
const res = await fetch(url)
if (!res.ok)
throw new Error(</span><span class="token string">Failed to download WOFF2 from </span><span class="token interpolation"><span class="token interpolation-punctuation punctuation">${</span>url<span class="token interpolation-punctuation punctuation">}</span></span><span class="token string">: </span><span class="token interpolation"><span class="token interpolation-punctuation punctuation">${</span>res<span class="token punctuation">.</span>status<span class="token interpolation-punctuation punctuation">}</span></span><span class="token template-punctuation string">)
return Buffer.from(await res.arrayBuffer())
}
const outDir = join(ROOT, 'public', 'fonts')
mkdirSync(outDir, { recursive: true })
const faceParts = []
const selectorParts = []
for (const font of FONTS) {
process.stdout.write(</span><span class="token string">Fetching </span><span class="token interpolation"><span class="token interpolation-punctuation punctuation">${</span>font<span class="token punctuation">.</span>family<span class="token interpolation-punctuation punctuation">}</span></span><span class="token string">…</span><span class="token template-punctuation string">)
const css = await fetchGoogleFontsCSS(font.family, font.text)
const woff2Url = extractWoff2Url(css, font.family)
const woff2 = await downloadWoff2(woff2Url)
const outPath = join(outDir, </span><span class="token interpolation"><span class="token interpolation-punctuation punctuation">${</span>font<span class="token punctuation">.</span>file<span class="token interpolation-punctuation punctuation">}</span></span><span class="token string">.woff2</span><span class="token template-punctuation string">)
writeFileSync(outPath, woff2)
console.log(
</span><span class="token interpolation"><span class="token interpolation-punctuation punctuation">${</span>woff2<span class="token punctuation">.</span>length<span class="token punctuation">.</span><span class="token function">toLocaleString</span><span class="token punctuation">(</span><span class="token punctuation">)</span><span class="token interpolation-punctuation punctuation">}</span></span><span class="token string"> bytes → public/fonts/biomes/</span><span class="token interpolation"><span class="token interpolation-punctuation punctuation">${</span>font<span class="token punctuation">.</span>file<span class="token interpolation-punctuation punctuation">}</span></span><span class="token string">.woff2</span><span class="token template-punctuation string">
)
faceParts.push(</span><span class="token string">@font-face { 	font-family: '</span><span class="token interpolation"><span class="token interpolation-punctuation punctuation">${</span>font<span class="token punctuation">.</span>family<span class="token interpolation-punctuation punctuation">}</span></span><span class="token string">'; 	src: url('/fonts/biomes/</span><span class="token interpolation"><span class="token interpolation-punctuation punctuation">${</span>font<span class="token punctuation">.</span>file<span class="token interpolation-punctuation punctuation">}</span></span><span class="token string">.woff2') format('woff2'); 	font-display: swap; 	font-style: normal; 	font-weight: 400; }</span><span class="token template-punctuation string">)
selectorParts.push(</span><span class="token string"> 		[data-biome='</span><span class="token interpolation"><span class="token interpolation-punctuation punctuation">${</span>font<span class="token punctuation">.</span>biome<span class="token interpolation-punctuation punctuation">}</span></span><span class="token string">'] { --biome-font: '</span><span class="token interpolation"><span class="token interpolation-punctuation punctuation">${</span>font<span class="token punctuation">.</span>family<span class="token interpolation-punctuation punctuation">}</span></span><span class="token string">' } 	</span><span class="token template-punctuation string">)
}
writeFileSync(
join(ROOT, 'src', 'biome-fonts.css'),
</span><span class="token string"> 		</span><span class="token interpolation"><span class="token interpolation-punctuation punctuation">${</span>faceParts<span class="token punctuation">.</span><span class="token function">join</span><span class="token punctuation">(</span><span class="token string">'\n\n'</span><span class="token punctuation">)</span><span class="token interpolation-punctuation punctuation">}</span></span><span class="token string"> 		</span><span class="token interpolation"><span class="token interpolation-punctuation punctuation">${</span>selectorParts<span class="token punctuation">.</span><span class="token function">join</span><span class="token punctuation">(</span><span class="token string">'\n'</span><span class="token punctuation">)</span><span class="token interpolation-punctuation punctuation">}</span></span><span class="token string"> 	</span><span class="token template-punctuation string">
)
View Transitions
I’ve recently written about the interactive cover component I’ve built for this project. It looks like this:
You are currently traversing a sea of fields.
The wind stirs a lullaby of grass and crickets, while an endless golden carpet unfolds beneath the sun — a land of boundless fertility.
I render this component on two different pages: in the character sheet, right next to the map, and in the biome-specific page. On the actual site, this component contains a link that you can click to head to the biome page to know more about this biome.
Because the same component is rendered in both places, I could use a view transition to smoothly animate the switch from one page to the other. All I had to do was turn on experimental support for view transition in Next.js, then wrap my component with ViewTransition and give it a name.
<ViewTransition name={`cover-${biome}`}>
	<Cover {...coverProps} />
</ViewTransition>
Blurred Background
As you may have noticed from the biome screenshot above, I’ve decided to use a blurred background for the navigation, in order to let some light through it and better showcase the background image (also support for backdrop-filter is over 95%).
Now, some menu items have sub-menus. And I also wanted the submenus to have a blurred background, for the same reason. However, Chrome has a bug with rendering nested elements with backdrop-filter: the nested elements do not get a filter applied.
The solution is rather simple: use a pseudo-element to apply the navigation blur.
.Nav {
	position: relative;
}
.Nav::before {
content: "";
position: absolute;
inset: 0;
backdrop-filter: blur(8px);
}
Math-Based Spiral Animations
I recently stumbled upon this gallery of mathematical curve based animations made in plain old SVG and JavaScript. They looked so enchanting, I knew I wanted to do something with them!
So I’ve put one on the home page, in plain sight, between the background cover and the hero content. It’s subtle, pale and slow, but it adds some dynamism to the page. I’ve picked the six-petal spiral, to represent the 6 biomes of the game.
There is also one on the biome page, in the “Magic” section. This time I took a more conventional spiral, rotating endlessly onto itself, which I thought fit well with the magic concept.
Cross-Fading Audio
The official rulebook recommends some specific soundtracks from TableTopAudio for each biome, to immerse you into your playing sessions. So of course, I’ve added a setting for you to be able to listen to these soundtracks directly on the site.
What I really wanted to achieve was for the audio to cross fade nicely when you go from one biome to the next. If soundtrack helps with immersion, an abrupt audio change would have the opposite effect. Turns out this is really annoying to do (even with AI support), and I think I’ve implemented it like 3 different times.
The first realisation (which took me longer than I care to admit) is that I can’t use a single native <audio> element. Because changing its src attribute would cause the browser to unmount the current audio and mount the new one, which results in an abrupt change. So I had to use the Audio API. I’ve tried a few different versions, and ultimately decided to use Howler, a JavaScript library to manage audio files on the web.
There is a fair amount of logic involved, and the code is not massively interesting albeit heavily commented, so you can check it if you want.
import { Howl } from 'howler'
const FADE_DURATION_MS = 5_000
export function AudioPlayer({ url }: { url: string }) {
const howl = useRef<Howl | null>(null)
const volumeRef = useRef(0.8)
const wasPlayingRef = useRef(false)
const [volume, setVolume] = useState(0.8)
const [isPlaying, setIsPlaying] = useState(false)
const [currentTime, setCurrentTime] = useState(0)
const [duration, setDuration] = useState(0)
// Extracted so both the effect and togglePlay can create a Howl consistently.
// The wasPlayingRef is updated via onplay/onpause so its value survives
// effect cleanup.
const buildHowl = useCallback((src: string) => {
const sound = new Howl({
src: [src],
format: ['mp3'],
html5: true,
loop: true,
volume: volumeRef.current,
onload: () => setDuration(sound.duration()),
onplay: () => {
setIsPlaying(true)
wasPlayingRef.current = true
},
onpause: () => {
setIsPlaying(false)
wasPlayingRef.current = false
},
// It's important not to set isPlaying to false on sound stop, because
// this is invoked automatically when unloading the sound. So as the sound
// fades out, Howler calls stop, which would turn off the player.
// onstop: () => setIsPlaying(false),
})
return sound
}, [])
useEffect(
function handleBiomeChange() {
// wasPlayingRef survives cleanup (unlike howl.current which is nulled
// there), so we can reliably know whether to auto-start the incoming track.
const wasPlaying = wasPlayingRef.current
// Fade out the previous sound (cleanup will unload it after the fade).
if (howl.current) {
howl.current.fade(volumeRef.current, 0, FADE_DURATION_MS)
}
// If there is no URL, stop the player and reset the state (which can happen
// when moving into a cell that has no biome and thus no audio).
if (!url) {
setIsPlaying(false)
setCurrentTime(0)
wasPlayingRef.current = false
return
}
// If nothing was playing, don’t construct a Howl yet, wait for the user
// to click play. This avoids the "HTML5 Audio pool exhausted" warning
// firing when Howler tries to obtain an audio node before any user gesture.
if (!wasPlaying) {
howl.current = null
return
}
// Something was already playing: swap to the new track immediately.
const sound = buildHowl(url)
sound.play()
howl.current = sound
return () => {
sound.fade(volumeRef.current, 0, FADE_DURATION_MS)
setTimeout(() => sound.unload(), FADE_DURATION_MS)
howl.current = null
}
},
[url, buildHowl]
)
// Stop playback when the component unmounts. This covers the lazy-init path
// where togglePlay created the Howl, that path returns no cleanup from
// handleBiomeChange, so without this effect the audio would keep playing
// after navigation.
useEffect(function cleanup() {
return () => {
if (howl.current) {
howl.current.fade(volumeRef.current, 0, FADE_DURATION_MS)
const sound = howl.current
setTimeout(() => sound.unload(), FADE_DURATION_MS)
howl.current = null
}
}
}, [])
// Poll current playback position while playing
useEffect(
function pollCurrentTime() {
if (!isPlaying) return
const id = setInterval(
() => setCurrentTime(howl.current?.seek() ?? 0),
1_000
)
return () => clearInterval(id)
},
[isPlaying]
)
const togglePlay = useCallback(() => {
if (!howl.current) {
// Howl was never created (lazy init path), build it now on user gesture.
if (!url) return
const sound = buildHowl(url)
sound.play()
howl.current = sound
return
}
if (howl.current.playing()) howl.current.pause()
else howl.current.play()
}, [url, buildHowl])
const seekTo = useCallback((time: number) => {
howl.current?.seek(time)
setCurrentTime(time)
}, [])
const changeVolume = useCallback((value: number) => {
volumeRef.current = value
setVolume(value)
howl.current?.volume(value)
}, [])
return <>/* Audio player UI */</>
}
Most importantly, it works, and it sounds so gooood. You have both soundtracks cross-fade smoothly across 5 seconds (could be more as well) which is very natural, and gives you the feeling of literally changing environment, like leaving a forest trail and arriving in a village or something.
Play a soundtrack below (disclaimer: each track loads about 5Mb of data when played), wait a bit for the volume to pick up, then switch biomes to experience the audio cross-fade. Of course on ProMe it would all happen automatically.
Markdown Journaling
The core game loop goes like this: you decide which adjacent hexagonal cell you want to move to, which takes a fraction of your day. When entering that cell, you roll an encounter at random: some are good (you meet someone, you find something), some are less good (a wild creature is menacing, the environment is hostile…).
And then you write your adventure down to make your journey canonical. That’s really where the “table-top” comes in. You’re supposed to take notes, so that you know what happened in each cell, and also know where to go back to, how to find your way back, and so on.
When I started playing, it took me half an hour before I got bothered writing things down in a notepad, because as much as I love writing, I genuinely don’t enjoy holding a pen. So I rapidly switched to Google Docs. And it was fine for a little while, but I ended up spending a lot of time formatting content so it looked nice, instead of playing.
So I’ve built the journaling feature inside the app, and it relies heavily on Markdown to keep you focused on what you write instead of how you write it.
I really wanted the journal to look good, and to be enjoyable to read! So I’ve built a rendering layer on top of the Markdown editor to enhance the way it looks. For instance:
- Biome names are highlighted with their theme color so they stand out. For instance: Silent Wastes.
- Cell coordinates are prefixed with a hex colored after their biome (if any), and become links that can take you to the map and select the exact cell. For instance: E12.
- Certain keywords like success and failure are highlighted and prefixed with an icon, just to make them stand out.
- You can easily render die characters (⚀, ⚁, ⚂, ⚃, ⚄, ⚅) using {1}, {2}… and card suits (♠, ♥, ♦, ♣) using {S}, {H}, {D} and {C}, to avoid having to copy paste them from somewhere.
- You can embed links to the different generators (like an NPC or a village), which will render cleanly, and offer a summary in a dialog when clicking them.
And all of this is basically done without you, as a player and writer, having to think much about it. You end up writing what you want to write, and once you save, it looks good.
The journal editor also exists in two flavors:
- As a full screen dialog, to really focus on the editing experience. This view also gives you some information about all of these embellishments so you know how to use them if you want.
- Or as a floating pop-up, kind of like the email composer in Gmail. You can expand or collapse it and it remains fixed to your window as you scroll and use the app below. This is useful to take notes while you use the rest of your character sheet.


User accounts & cloud sync
As I mentioned, the app stores your progress in local storage. It works great, until you want to switch devices, or change browsers, or your laptop breaks and you lose your character. To work around the problem, I’ve added JSON export, so you can save a snapshot of your character as a file somewhere (and re-import it), but it’s not super convenient.
I wanted to see if I could add some form of optional authentication while a) keeping it simple because I don’t want to do backend and b) keeping it cheap because I don’t want to pay for it.
It turns out that Netlify, which I use for hosting, has something called Netlify Identity. It’s basically an auth toolkit to let your users authenticate with Google, GitHub, GitLab or Bitbucket or even email and password. I’ve decided to use Google only.
That solved the authentication part, but not the storage. Like okay, now I have a JWT for that user, and now what? Netlify has its own database solution called Netlify DB built on top of Neon. They make the onboarding quite easy I must say, and I had it working in no time.
What was a bit more difficult was designing a thorough synchronization system between the local and cloud storages that keeps working offline. It took a bit of back and forth with Claude Code, and we came up with something like this:
- Being unauthenticated obviously means local only. When the user isn’t logged in, all reads and writes go exclusively to local storage. The remote store is never touched.
- Signing in triggers a full bidirectional sync. On login, the app compares every character by ID in both stores. Three cases are resolved:
- Only in local storage → pushed to remote.
- Only in remote storage → pulled to local (preserving its original timestamp).
- In both storages → the version with the more recent
updatedAtwins, and the older side is overwritten.
- Data writes are local-first. Every data update always hits local storage first. The local write is authoritative: it generates IDs and sets the
updatedAttimestamp before anything goes to the cloud. - Remote writes are fire-and-forget. After a successful local write, the same data is pushed to the remote database. If that push fails, the error is swallowed silently: the data is already safe locally, and the next sync will retry.
- Equal timestamps (however unlikely) result in no-op. If both sides already agree on a character, nothing is written, making the sync safe to re-run at any time without side effects.
On top of that, I hooked onto the online and offline browser events to trigger storage syncs and helpful notifications.
export function useNetworkStatus() {
	const { message } = App.useApp()
useEffect(
function handleConnectivityChanges() {
function handleOffline() {
message.warning('Now offline: saving locally only.')
}
async function handleOnline() {
message.success('Back online: syncing to cloud.')
try {
await characterStore.syncToRemote()
} catch (error) {
console.error('Reconnect sync failed:', error)
}
}
window.addEventListener('offline', handleOffline)
window.addEventListener('online', handleOnline)
return () => {
window.removeEventListener('offline', handleOffline)
window.removeEventListener('online', handleOnline)
}
},
[message]
)
}
Wrapping up
After weeks working on this, there is a lot more I could be sharing, but those were the highlights and the more interesting technical bits.
I have to say, this was such a fun project to work on, all very casual and relaxing. It felt nice coding for entertainment, without worrying about adoption, purpose or monetization. Still though, I put a lot of effort into accessibility, performance and SEO, just for the sake of a job well done.
Once again, thank you to Enzo Salviato for his outstanding work on the Protector’s Memories. Be sure to give the game a try, you’ll love it! :)