Node-RED is a low-code software development tool that provides a browser-based editor that makes it easy to automate flows for building IoT services. Built on Node.js, taking full advantage of Node.js’ non-blocking and event-driven paradigm. It’s lightweight and can run at the edge of the network on low-cost hardware such as Raspberry Pi, as well as in the cloud.
In this tutorial, we’ll cover what Node-RED does, how it can be deployed on various platforms, and its use cases. We’ll build a demo application flow that notifies users when their specified platform account is logged into, allows the user to create an order, and displays the orders in a UI table. We’ll also explore some improvements in Node-RED v4 that make configurations easier.
Prerequisites
- Have at least Node.js 18
- Knowledge of Docker
- A MongoDB Atlas account
- Experience deploying applications to cloud platforms
- An email service (e.g., Gmail, SMTP server) to send emails
Use cases for Node-RED
Here are some practical use cases for Node-RED:
Home automation: Node-RED can be used to automate home appliances. A typical use case is watering gardens at specific intervals, and turning off the security lighting systems during the day and on at night.
Security system automation: Node-RED can be used to automate security systems. A typical use case is integration with security cameras, doors, and gates to restrict unwanted persons from entering. It can also integrate with alarms, triggering them if an unwanted person tries to force entry.
Industrial automation: Node-RED can also be used to automate industrial processes. A typical use case is integration with factory machinery to optimize production lines. It is commonly used for monitoring, logging, and improving observability in energy management.
Prototype development: Node-RED supports external module emulators that virtually simulate IOT hardware devices like Raspberry Pi. All you have to do is install the module and then access a variety of IOT device emulators. This is very handy for building prototypes to experiment with before committing to actual development.
Building a demo application flow with Node-RED
In this section, we’ll build a Node-RED application flow that:
- Notifies users once their specified platform account is logged into
- Allows the user to create an order
- Displays the orders in a table format
First, you need to have Node.js installed on your machine. Next, open your terminal or command prompt and run the following commands to install and run Node-RED, respectively:
npm install -g node-red
node-red
Next, open your web browser and go to http://localhost:1880 to access a running instance of Node-RED. We’ll make use of the following nodes:
Email: Allows you to send and receive emailsInject: Allows you to inject messages into a flow by clicking the button on the node or setting a time interval between injectsHTTP request: Allows you to send an HTTP request and receive the response
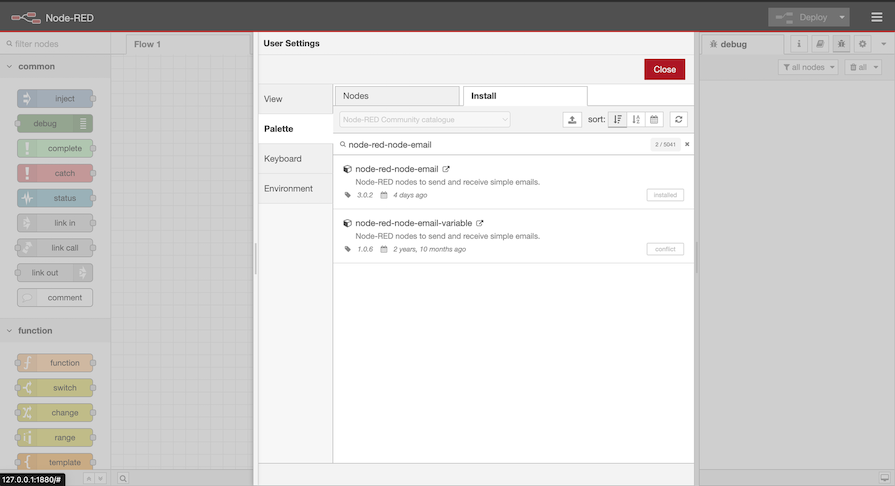
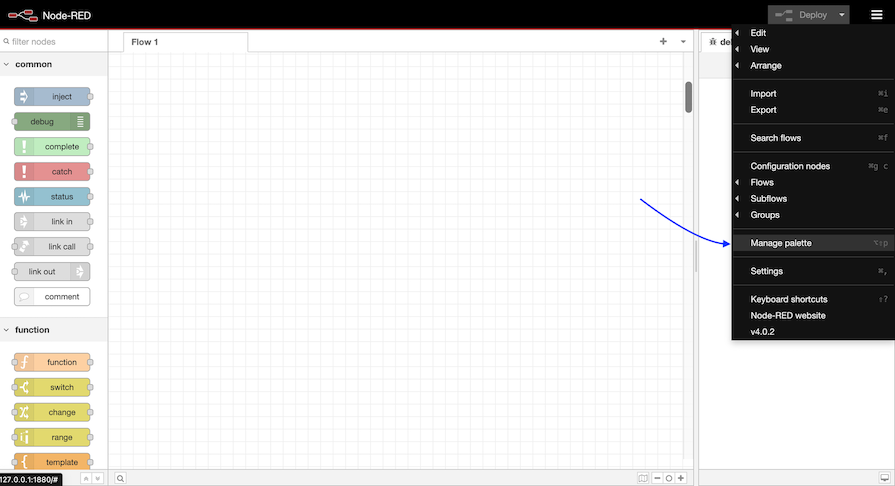
In the Node-RED palette, navigate to the hamburger menu and click Manage palette, as shown in the image below:

Next, click on the Install tab and search for and install node-red-node-email:
Next, click on the nodes icon in the left sidebar, and enter “email” in the search field:
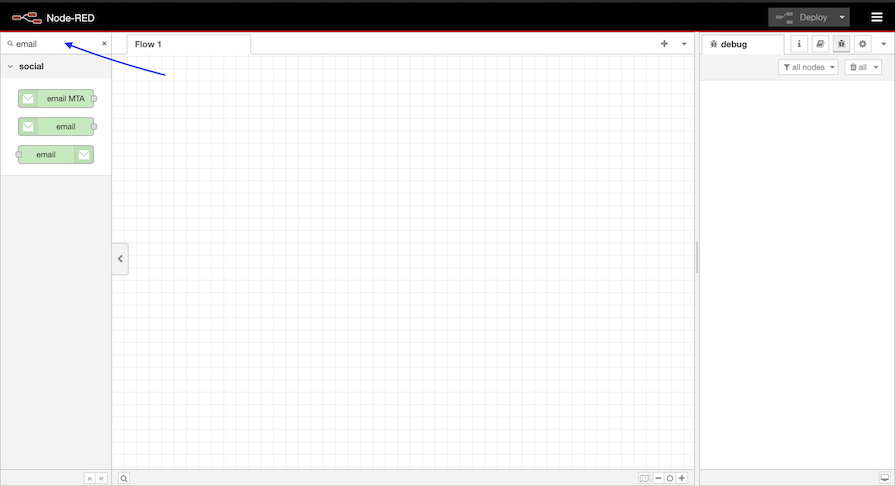
Drag the email, HTTP request, and inject nodes onto the workspace from the palette.
Configuring the HTTP request node
Double-click on the HTTP request node to open its configuration pane:

Use the configuration as seen in the image above. Replace the URL value with the website login endpoint you want.
Configuring the email node
Now, double-click on the email node to open its configuration pane:
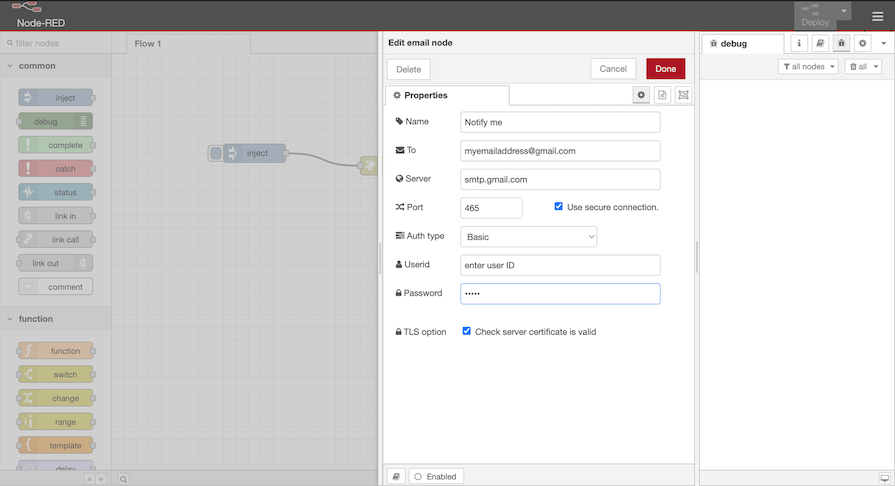
Enter the password and email ID used in your email service and the recipient’s email address. Click on the email node, then on the help icon on the top right sidebar to see the expected payload for the email node.
Next, double-click on the inject node to open its configuration pane and enter the following values:
msg.payload: {"email":"email address","password":" enter password"}
msg.topic: Login notification
Finally, click Done.
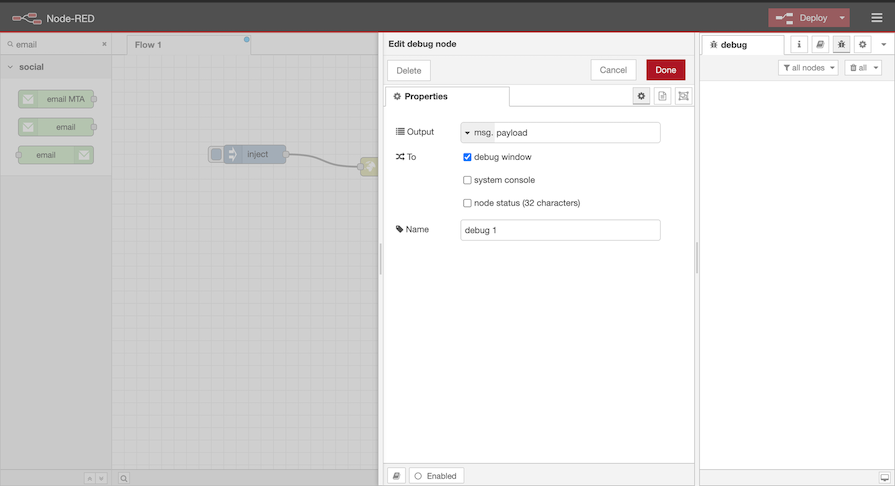
Add a debug node to view the response from the POST request. Configure it to display the msg.payload, which will contain the response data:
Connecting and deploying nodes
Connect the nodes in the following manner: Inject → HTTP request → Debug → email by dragging between the output port of one to the input port of the other:
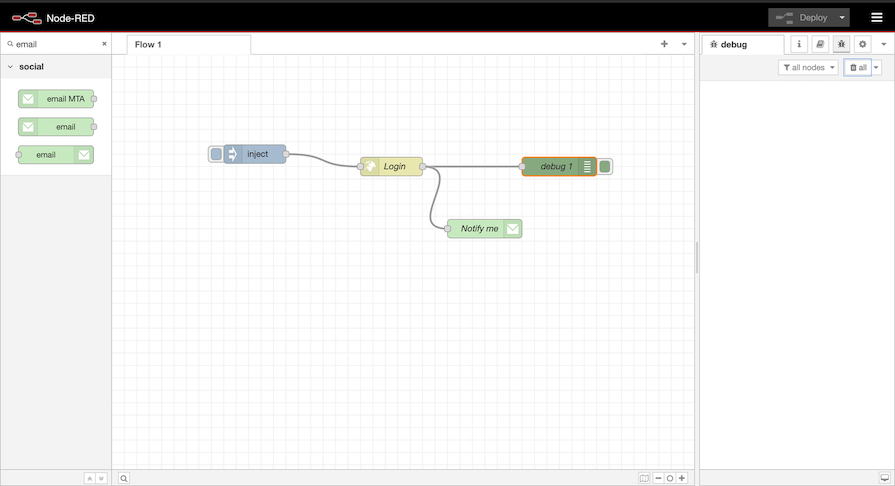
Then, click the Deploy button to deploy the flow to the server. You’ll receive an email once their account is logged in. This comes in handy if an unknown user logs in to your account.
Creating an order
Now, add the HTTP In node for handling order creation, and configure it as follows:
Method: POST
URL: /create-order
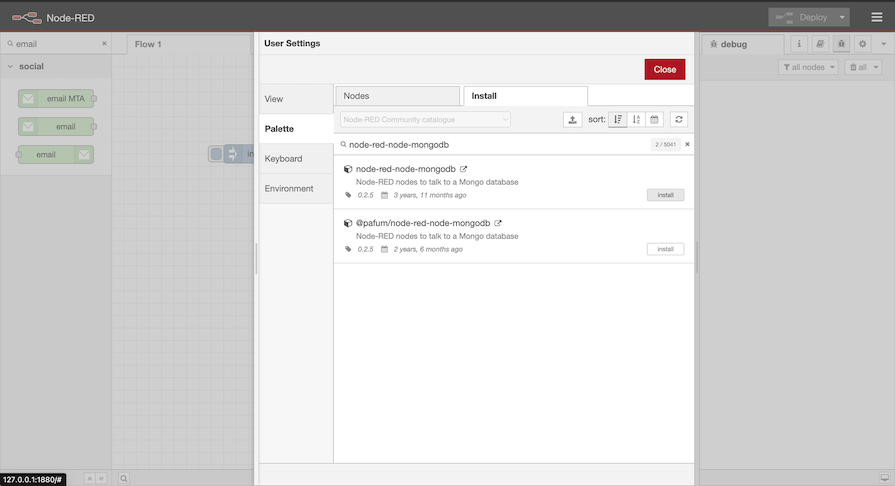
Head back to Manage palette > Install. Then, search for node-red-node-mongodb and click the Install button:
Setting up a MongoDB connection
Drag a mongodb out node to your workspace. Then, configure the connection by entering your MongoDB Atlas connection string (e.g., mongodb://username:password@host:port/dbname). Next, choose the database and collection where you want to store the orders.
Inject node
Use an inject node to manually trigger the flow for testing and set the payload to a JSON object representing an order as follows:
{
    "order_id": "12345",
    "user_id": "67890",
    "items": [
        {"product_id": "abc123", "quantity": 2, "price": 29.99},
        {"product_id": "def456", "quantity": 1, "price": 49.99}
    ],
    "total": 109.97,
    "status": "pending"
}
Function node
Add the following logic to a function node to add the created_at field to the msg.payload:
msg.payload = {
    order_id: msg.payload.order_id,
    user_id: msg.payload.user_id,
    items: msg.payload.items,
    total: msg.payload.total,
    status: msg.payload.status,
    created_at: new Date()
};
return msg;
MongoDB node
Add a mongodb out node and connect it to the output of the function node. In the mongodb out node, select Insert as the operation and the collection where you want to store the order data.
Debug node
Add a debug node to view the output after inserting the order into the database, then connect it to the mongodb node.
Use an HTTP response node to send the order creation confirmation back to the user.
Displaying orders on a table
In the previous section, we successfully created a flow to create orders and save them to the mongoDB database via the mongoDB node. Now, we need to create a flow to retrieve the orders from the database and display them on the table.
Inject node
Add an inject node to trigger the retrieval of orders from MongoDB. You can set it to trigger manually or at regular intervals.
MongoDB node
Add a mongodb in node and connect it to the inject node. Configure the operation to find and specify the query {} to retrieve all documents.
Function node (optional)
Add a function node to format the MongoDB documents if necessary.
UI table node
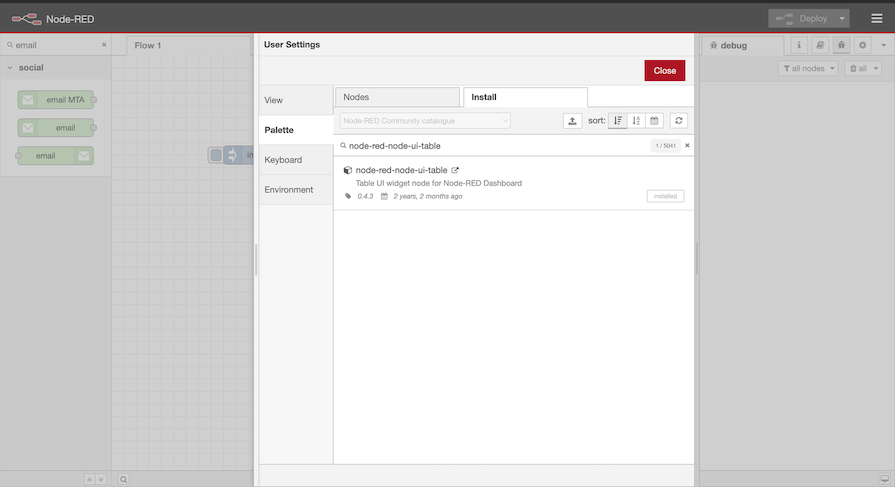
Navigate to the hamburger menu > Manage palette > Install:
Search for node-red-node-ui-table and click the Install button:
Click on the nodes icon in the left sidebar, and enter “ui_table” in the search field. Add a table node to the pane and connect it to the output of the function node. Configure the table to display the data correctly.
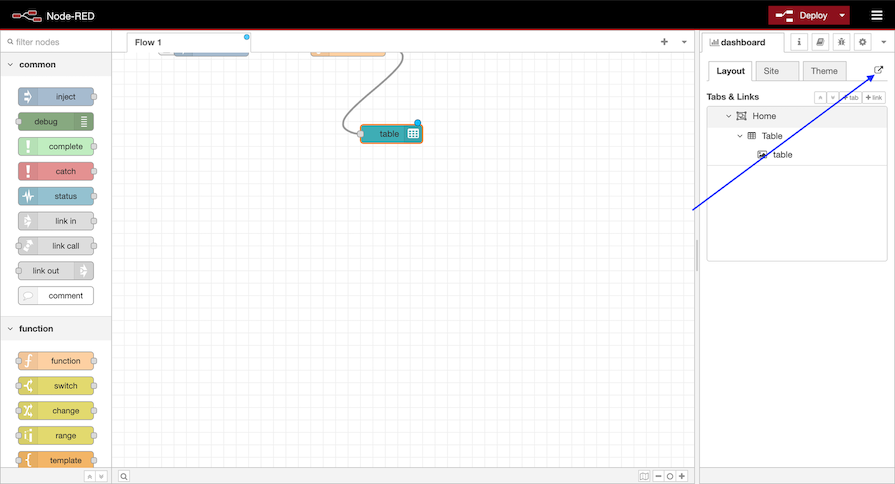
To view the table, click on the hamburger menu again, and navigate to View > Dashboard. Then click on the arrow icon as seen below:
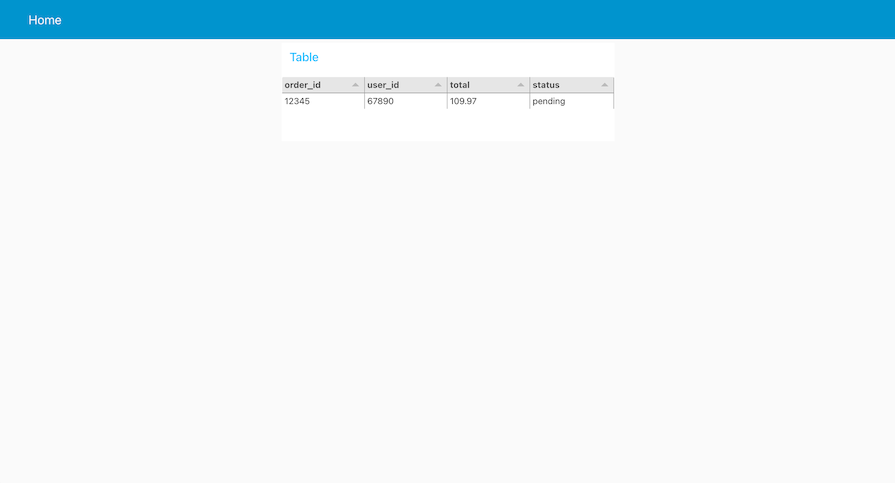
This will open a new tab that displays the orders in a table:
Deploying Node-RED on different platforms
Node-RED can be deployed on various platforms. It can run locally via npm or Docker, and it can run on hardware devices such as Raspberry Pi, BeagleBone, Arduino, and Android, and can be deployed on cloud services like FlowFuse, Amazon Web Services, Microsoft Azure, and GCP.
Deploying Node-RED on local machines
Via npm
First, you need to have Node.js installed on your machine. Next, open your terminal or command prompt and run the following command to install Node-RED:
npm install -g node-red
Start Node-RED by running the following command:
node-red
Open your web browser and go to http://localhost:1880 to access a running instance of Node-RED.
Via Docker
To run Docker in its simplest form, just run:
docker run -it -p 1880:1880 -v node_red_data:/data --name mynodered nodered/node-red
Run the following command if you need to restart the container:
docker start mynodered
Run the following command if you need to stop the container:
docker stop mynodered
To persist flows if the container is destroyed, mount a data directory to a volume outside the container. The configuration data is stored in the /data directory inside the container.
Deploying Node-RED on the Azure cloud platform
To deploy Node-RED on Azure, you need to create an Azure account or sign in to the Azure console, if you have an existing account.
Now, we need to create a virtual machine that the Node-RED flow will be deployed to. Navigate to Virtual machine > Create > Azure Virtual Machine:
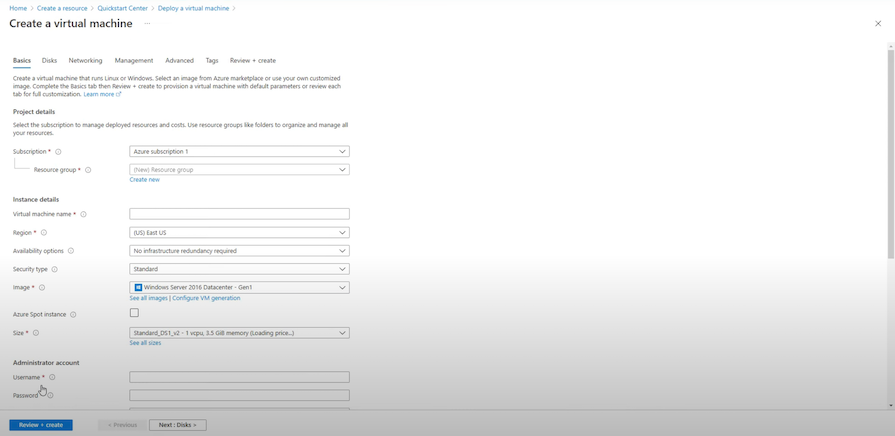
Configure the basic info in the above image as follows:
- Resource group: Click the create new button and enter any value
- Virtual machine name: Enter the virtual machine name
- Region: Select any suitable location for the VM
- Availability options: Leave as default
- Security type: Leave as default
- Image: Select an operating system of choice
- VM architecture: Select architecture that is supported with the selected image
- Size: Choose the size suitable for your workload
- Enter the username and password, and confirm the password
Next, navigate to the Networking tab:

In the NIC network security group, change the option from Basic to Advanced. Then, in the Configure network security group, click on Create New.
Click on + Add an inbound rule, and set the values as follows:
| Destination port ranges | 1880 |
|---|---|
| Protocol | TCP |
| Priority | 1010 |
| Name | Any name |
Leave the remaining tabs with their default values and click the Review + create tab, then click Create to create a virtual machine with these configurations.
Accessing your virtual machine’s shell
We’ll need to access the VM using our local machine to deploy our Node-RED flows. To achieve this, navigate to your virtual machine and click connect > SSH:

Click on other clients to follow up on how to connect to your VM using the command line.
Run the following on your terminal to generate a public/private RSA key pair:
ssh-keygen -m PEM -t rsa -b 4096
Navigate to Private key path and enter the path to your SSH private key file.
To connect to the VM, run the example command in step four on your terminal. You should be in the Ubuntu VM if everything works fine from your end.
Click test your connection and OK on the pop-up dialog. Click Test Connection and you should get a success message.
Install Node-RED on the Ubuntu Virtual Machine
First, you’ll need to refresh your local package index:
sudo apt update
Next, install the recommended version of Node.js on the machine:
sudo apt install nodejs
Check that the installation was successful by querying node for its version number:
node -v
Then, install Node-RED:
sudo npm install -g --unsafe-perm node-red
Run the following command to start Node-RED:
node-red
Open your browser and go to <public ip address>:1880 to see Node-RED running on your Azure cloud infrastructure.
Now you can design your flows and deploy them instantly to the cloud. You can also import existing flows to Node-RED in the VM. To do so, click Menu in the Cloud Node-RED, then click Manage Palettes. Install the same palettes as seen in your local Node-RED.
Then, click on Menu > Import and paste the JSON content or import the .json file in your local Node-RED, then click Import.
Click Deploy to save and deploy the flows.
How Node-RED v4 makes configuration easier
Node-RED now distinguishes between nodes with configuration changes and those that have only been moved. This improves flow diffs when viewing the changes made to a flow.
The Add button next to the select box in the node selection UI makes it easier to work with the config nodes, thereby improving the development experience.
V4 provides options for timestamp format for date/time nodes. These options include ISO 8601, a common format used in many systems, and JavaScript Date Object.
The flow/global context inputs and the env input now all include auto-complete suggestions based on the live state of your flows.
Node-RED now caches the palette state of any filter you have applied together with the palette categories you have hidden between reloads.
Conclusion
With the increasing demand for home and industrial automation solutions, using a development tool like Node-RED, which offers emulators for all the possible IOT hardware devices like Raspberry Pi and others, makes it easy to build prototypes and proof-of-concept applications, reducing the cost of experiment during the ideation phase of the development cycle.
In this guide, we offered a step-by-step guide for how to build flows with Node-RED and deploy them to various platforms.
The post Enhance your workflow with Node-RED v4.0 appeared first on LogRocket Blog.