Editor’s note: This article was updated on 4 December 2024 by Emmanuel John to address the changes to performance and error handling in Go v1.23.

Deep linking and universal links are the gateways to your application. Deep linking is already part of a seamless experience that any mobile application should have.
Ultimately, they help to reduce churn and increase the loyalty of your user base. Implementing them correctly will directly impact your ability to master campaigns and run promotions within your application.
The deep linking question is as important today as ever before, specifically taking into consideration Identifier for Advertisers (IDFA) and a rising number of walled gardens. Well-executed deep linking will enable your retargeting campaigns and bring engagement to a new level, allowing end users to have a seamless one-click experience between the web and your application.
Once users have already discovered and installed your application, deep linking is the perfect tool to retain those newly acquired users.
In this article, I outline existing ways to implement deep linking and how to test it using the React Native TypeScript codebase. You can find the full source code for this project available on GitHub.
What is deep linking and why is it important?
In a nutshell, deep linking is a way to redirect users from a webpage into your application in order to show a specific screen with the requested content. It can be a product, an article, secure content behind a paywall, or a login screen.
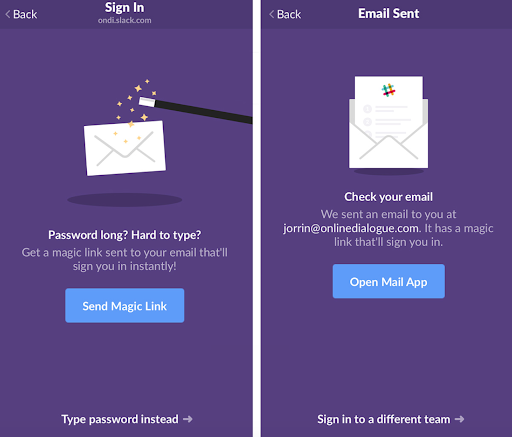
One of the most famous examples is the Slack link that they send to your email. This link opens right inside the application, authorizing you to use it with your email account — no account setup needed.

Deep linking is paramount in 2024. Every effort to lead your users into the app and improve their engagement heavily depends on the strategy on top of the deep linking.
Deep linking is important because:
- Marketing campaigns
- User retention
- Seamless redirects between web and mobile
- Content delivery behind a paywall or login authentication
- Increasing customer lifecycle
- Improving loyalty
- Minimizing churn
- Improved search engine ranking
Implementing deep linking requires a more intricate understanding of iOS and Android for extra configuration of each platform in your React Native project.
Take, for example, this syntax diagram of the following URL:
billing-app://billing/1

Whenever you navigate to a website using, for example, https://reactivelions.com, you use a URL in which the URL scheme is “https”. In the example above, billing-app is a URL scheme for your deep linking URL.
Deep linking and universal linking in iOS
Starting with iOS 9, Apple introduced universal links to reduce confusion and simplify the user experience. Apple has also introduced support for universal links on macOS with macOS 10.15.
The idea behind universal links is to connect specific website URLs that match content on your website with content inside your application. Another thing to note: the Apple dev team recommends migrating from custom URL schemes to universal links. This is because custom schemes are less secure and vulnerable to exploitation.
Universal links establish a secure connection between your app and website. In Xcode, you enable your app’s entitlement to handle specific domains, while your web server hosts a JSON file detailing the app’s accessible content. This mutual verification prevents others from misusing your app’s links.
This URL would act the same way as the deep linking URL I have shown in the previous section:
https://app.reactivelions.com/billing/3
Configuring universal links requires extra steps on both the server side and mobile side.
First, you start on the server side, where you need to upload a JSON-formatted file that defines the website’s association with a mobile application and its specific routes.
Let’s say you run the example.com domain and want to create an association file. Start by creating a folder or a route in your root domain .well-known, then add JSON content inside the apple-app-site-association:
https://example.com/.well-known/apple-app-site-association
Add JSON content to define website associations:
{
   "applinks": {
       "apps": [],
       "details": [
           {
               "appID": "ABCD1234.com.your.app",
               "paths": [ "/billing/", "/billing/*"]
           },
           {
               "appID": "ABCD1234.com.your.app",
               "paths": [ "*" ]
           }
       ]
   }
}
Check your Apple developer portal to confirm your appID.
Your web server must have a valid HTTPS certificate, as HTTP is insecure and cannot confirm the link between your app and website. The HTTPS certificate’s root must be recognized by the operating system, as custom root certificates aren’t supported.
If your app is targeting iOS 13 or macOS 10.15 and later, the “apps” key is no longer necessary and can be removed. However, if you’re supporting iOS 12, tvOS 12, or earlier versions, you’ll still need to keep the “apps” key included.
If you have multiple apps with the universal links configuration, and you do not want to repeat the relevant JSON you can use this:
{
   "applinks": {
       "apps": [],
       "details": [
           {
               "appIDs": ["ABCD1234.com.your.app", "ABCD1234.com.your.app2"],
               "paths": [ "/billing/", "/billing/*"]
           },
       ]
   }
}
Use this if you are targeting iOS 13, or macOS 10.15 and later. But if you need to support earlier releases, you should stick to using the singular appID key for each app.
Path configuration
The paths key uses terminal-style pattern matching for URLs, where * represents multiple characters and ? matches one. Early this year, the paths key was replaced with components, which uses an array of dictionaries for URL component pattern matching. Components include the path (marked by /), fragment (marked by #), and query (marked by ?).
{
   "applinks": {
       "apps": [],
       "details": [
           {
               "appIDs": ["ABCD1234.com.your.app", "ABCD1234.com.your.app2"],
               "components": [
                  "/": "/path/*/filename",
                  "#": "*fragment",
                  "?": "widget=?*"
               ]
           },
       ]
   }
}
Older versions like iOS 12, tvOS 12, and earlier macOS versions still use the paths key, but newer versions will ignore it if components are present.
If parts of your website aren’t intended to be represented in the app, you can exclude these sections using the exclude key with true as its value.
"components": [
  "/": "/path/*/filename",
  "#": "*fragment",
  "?": "widget=?*",
  "exclude": true
]
This functions similarly to the not keyword in the old paths key, though not isn’t compatible with the new components dictionary.
URL pattern matching demo
Here’s how you can handle URL pattern matching for a meal ordering app using JSON to define component patterns in Universal Links:
- Order forms with a fixed path structure
To match order forms at example.com/{any}/order:
{
  "components": [
    {
      "/": "/*/order"
    }
  ]
}
This matches any path that has an arbitrary first component followed by /order.
Example URLs:
https://example.com/user/order
https://example.com/product/order
- Matching taco orders with cheese query
To match URLs with /taco and a cheese query item:
{
  "components": [
    {
      "/": "/taco",
      "?": { "cheese": "*" }
    }
  ]
}
The * in the query will match any value for cheese.
Example URLs:
https://example.com/taco?cheese=cheddar
https://example.com/taco?cheese=mozzarella
- Excluding specific coupon codes
To exclude coupon codes starting with 1 and match other codes:
{
  "components": [
    {
      "/": "/coupon",
      "exclude": true,
      "pattern": "/coupon/1*"
    },
    {
      "/": "/coupon",
      "pattern": "/coupon/*"
    }
  ]
}
Here, the first entry excludes codes starting with 1, while the second matches all other coupon codes.
Example URLs:
Excluded: https://example.com/coupon/1234
Matched: https://example.com/coupon/5678
For the production-ready backend, you can test if your website is properly configured for Universal Links using the aasa-validator tool.
How to configure your Xcode project
To demonstrate how deep linking works, we’ll build a simple test application. This application will have straightforward navigation between the Home and Billing screens using the @react-navigation component:
npx react-native init BillingApp --template
Open your Xcode workspace:
open BillingApp/ios/BillingApp.xcworkspace

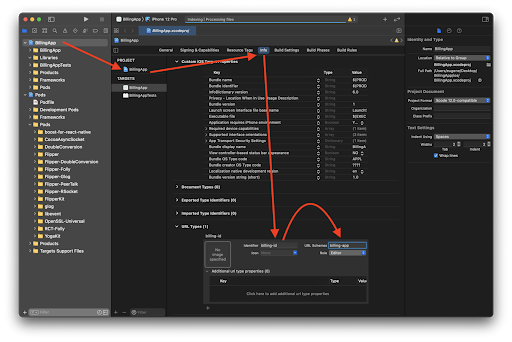
In your Xcode window, select your newly created project in the left pane (in our case it’s BillingApp). Next, select the BillingApp target inside the newly opened left pane of the internal view for the BillingApp.xcodeproj.
Navigate to the Info section in the top center of that view, then go to the very bottom and click the plus (+) sign under URL Types. Make sure to add billing-id as your new Identifier and specify URL Schemes as billing-app.
By following these steps above, you’ve enabled iOS project configuration to use deep links like billing-app://billing/4 inside your Objective C and JavaScript code later on.
After configuring Xcode, the next step will be focused on React Native. I will start with linking part of the React Native core called LinkingIOS. You can read more about it in the official documentation here.
Its main goal is to construct a bridge that will enable a JavaScript thread to receive updates from the native part of your application, which you can read more about in the AppDelegate.m part below.
Go to ios/Podfile and add this line under target:
pod 'React-RCTLinking', :path => '../node_modules/react-native/Libraries/LinkingIOS'
And then make sure to update your pods using this command:
cd ios && pod install
The next step is to enable the main entry points of your application to have control over the callbacks that are being called when the application gets opened via deep linking.
In this case, we implement the function openURL with options and pass its context to RCTLinkingManager via its native module called RCTLinkingManager.
#import <React/RCTLinkingManager.h>
- (BOOL)application:(UIApplication *)application openURL:(NSURL *)url options:(NSDictionary<UIApplicationOpenURLOptionsKey,id> *)options { return [RCTLinkingManager application:application openURL:url options:options]; }
If you’re targeting iOS 8.x or older, you can use the following code instead:
#import <React/RCTLinkingManager.h>
- (BOOL)application:(UIApplication *)application openURL:(NSURL *)url sourceApplication:(NSString *)sourceApplication annotation:(id)annotation { return [RCTLinkingManager application:application openURL:url sourceApplication:sourceApplication annotation:annotation]; }
For the universal links, we will need to implement a callback function continueUserActivity, which will also pass in the context of the app and current universal link into the JavaScript context via RCTLinkingManager.
- (BOOL)application:(UIApplication *)application continueUserActivity:(nonnull NSUserActivity *)userActivity
restorationHandler:(nonnull void (^)(NSArray<id<UIUserActivityRestoring>> * _Nullable))restorationHandler
{
return [RCTLinkingManager application:application
continueUserActivity:userActivity
restorationHandler:restorationHandler];
}
Deep linking in Android
Android deep linking works slightly differently in comparison to iOS. This configuration operates on top of Android Intents, an abstraction of an operation to be performed. Most of the configuration is stored under AndroidManifest.xml and works by actually pointing to which Intent will be opened when the deep link is executed.
How to configure your Android Studio project
Inside your Android manifest android/app/src/main/AndroidManifest.xml we need to do the following:
- Configure the
Intentfilter - Define the main
Viewaction and specify two main categories:DEFAULTandBROWSABLE - Finalize the configuration by setting the scheme to
billing-appand defining the main route asbilling
This way Android will know that this app has deep linking configured for this route billing-app://billing/*:
<intent-filter android:label="filter_react_native">
 <action android:name="android.intent.action.VIEW" />
 <category android:name="android.intent.category.DEFAULT" />
 <category android:name="android.intent.category.BROWSABLE" />
 <data android:scheme="billing-app" android:host="billing" />
</intent-filter>
Navigation and deep linking
In most production-grade applications you’ll end up having multiple screens. You’re most likely to end up using some form of component that implements this navigation for you. However, you can opt out and use deep linking without navigation context by invoking React Native’s core library via JavaScript by calling Linking directly.
You can do this inside your React Native code using these two methods:
- If the app is already open:
Linking.addEventListener('url', ({url}) => {}) - If the application is not already open and you want to get the initial URL, use this call:
Linking.getInitialURL()
Use the acquired deep linking URL to show different content, based on the logic of your application.
If you’re using @react-navigation you can opt-in to configure deep linking using its routing logic.
For this, you need to define your prefixes for both universal linking and deep linking. You will also need to define config with its screens, including nested screens if your application has many screens and is very complex.
Here’s an example of how this configuration looks for our application:
import { NavigationContainer } from '@react-navigation/native';
export const config = {
 screens: {
   Home: {
     path: 'home/:id?',
     parse: {
       id: (id: String) => `${id}`,
     },
   },
   Billing: {
     path: 'billing/:id?',
     parse: {
       id: (id: String) => `${id}`,
     },
   },
 },
};
const linking = {
 prefixes: ['https://app.reactivelions.com', 'billing-app://home'],
 config,
};
function App() {
 return (
   <NavigationContainer linking={linking} fallback={<Text>Loading...</Text>}>
     {/* content */}
   </NavigationContainer>
 );
}
In the code section above, we introduced universal linking and walked through the steps needed to define universal link association on your website’s server end. In Android, there’s something similar called Verified Android App Links.
You can also check out the react-navigation documentation for more details on configuring links.
Using Android App Links helps you avoid the confusion of opening deep links with other applications that aren’t yours. Android usually suggests using a browser to open unverified deep links whenever it’s unsure if they’re App Links (and not deep links).
To enable App Links verification, you will need to change the intent declaration in your manifest file like so:
<intent-filter android:autoVerify="true">
To create app-verified links you will need to generate a JSON verification file that will be placed in the same .well-known folder as in the Xcode section:
keytool -list -v -keystore my-release-key.keystore
This command will generate an association with your domain by signing the configuration with your keystore file:
[{
  "relation": ["delegate_permission/common.handle_all_urls"],
  "target": {
    "namespace": "android_app",
    "package_name": "com.mycompany.app1",
    "sha256_cert_fingerprints":
    ["14:6D:E9:83:C5:73:06:50:D8:EE:B9:95:2F:34:FC:64:16:A0:83:42:E6:1D:BE:A8:8A:04:96:B2:3F:CF:44:E5"]
  }
}]
Then place the generated file on your website using this path:
https://www.example.com/.well-known/assetlinks.json
How to test deep links
After going through all configurations and implementations, you want to ensure you’ve set everything up correctly and that deep links work on each platform of your choice.
Before you test universal links or Android App Verified Links, make sure that all JSON files are uploaded, available, and up to date for each of your domains. Depending on your web infrastructure, you might even want to refresh your Content Delivery Network (CDN) cache.
A successful deep linking test means that, after opening a deep link in the browser, you are forwarded to your application and you can see the desired screen with the given content.
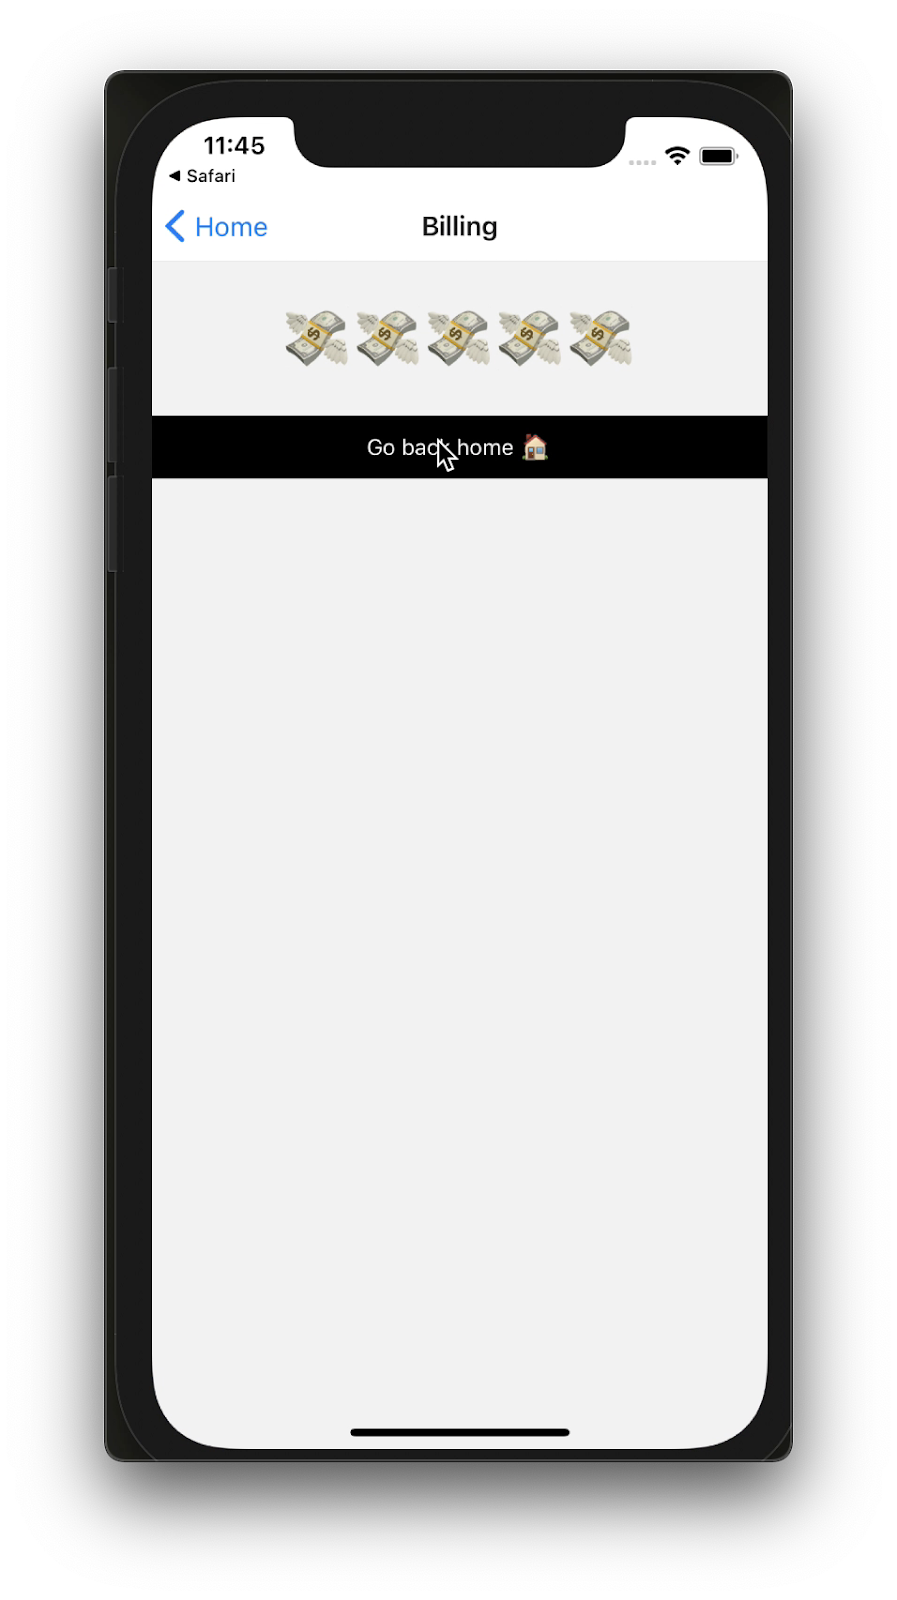
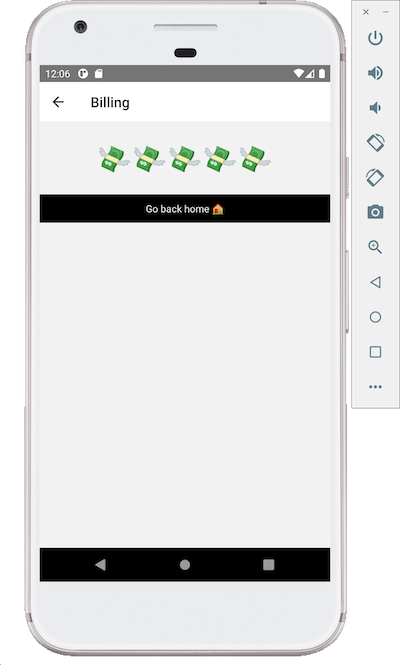
When you go to the billing screen you can specify a number, and the application will render the same number of emojis with flying dollar banknotes. Our application has Home and Billing screens.
If you try to go to the Billing screen from your Home screen, it won’t pass any content, and therefore it will not render any emojis.
In your terminal, you can use these commands to test deep linking for each platform. Play around by changing the number at the end of your deep linking URL to see different numbers of emojis.
- iOS
npx uri-scheme open billing-app://billing/5 --ios
You can also open Safari and enter
billing-app://billing/5in your address bar, then click go.
- Android
npx uri-scheme open billing-app://billing/5 --android

Next steps
You might have noticed that I used TypeScript to write the code for this project. For this project, I’ve implemented custom property types that require custom declarations for each screen. Check props.ts to see these type declarations.
As I mentioned earlier, if you’re building a production-grade application, you’re most likely to end up building complex routing and will need nesting routes to be implemented with your navigator library.
Nesting navigation will enable you to decompose each screen into smaller components and have sub-routes based on your business logic. Learn more about building nesting routes using @react-navigation here.
Looking forward to seeing what you build with this!
The post Understanding deep linking in React Native appeared first on LogRocket Blog.