Next.js is an open-source React framework developed by Vercel for building high-quality web applications. It offers advanced features, such as built-in search engine and image optimizations, server-side rendering, API routing, file-based routing, and more.

In this guide, you’ll learn how Next.js is better than React, how to create your first app, and how to build fully functional web applications with Next.js.
Why choose Next.js?
Next.js provides a lot of important features that enable us to build advanced and highly performant web applications. In this section, you’ll learn about some of its main features.
Built-in routing system
Next.js has a built-in routing system that automatically creates a page route when you add a new folder containing a page.tsx file. For example, to declare a /home client route, simply create a home folder containing a page.tsx file. Unlike React, where you need to install a separate routing library like React Router.
Full-stack web framework
Next.js enables you to build a full-stack application within a single project. In Next.js, you can declare API route handlers or endpoints that handle and manage data between the client and server. Unlike React, Next.js allows you to write both the client and server code in a project and deploy them on a single server.
Image optimization
Next.js provides built-in image optimization through its powerful Image component, designed to enhance the performance and user experience of the web application. This component supports lazy loading and automatically optimizes images for faster load times by resizing, compressing, and serving them in modern formats like WebP.
Server-side rendering
Next.js enables server-side rendering, which means pages are pre-rendered on the server before being sent to the client. This improves page load times and enhances SEO since search engines can effectively crawl and index the pre-rendered content.
Getting Started with Next.js
In this section, you’ll learn how to create your first Next.js project. First, you need to have a basic understanding of HTML, CSS, and React to work with Next.js.
Next, confirm that you have at least the Node.js v18.17 installed on your computer by running node -v in your terminal.
Create a Next.js project by running the code snippet below.
npx create-next-app <project-name>
When creating a new project, Next.js recommends TailwindCSS – a CSS framework for building modern applications, Typescript – for writing type-safe programs, and the Next.js App Router.
Finally, start the development server by running the code snippet below:
npm run dev
Next.js Project Overview
A Next.js project contains multiple files and folders that work together to create the necessary functionalities required to build high-quality web applications.

The node_modules folder contains the package dependencies needed to run the Next.js project.
The public folder contains static files and the default images.
The src folder contains an app folder, which holds the application’s pages, API routes, and UI components.
You’ll learn more about them later in the tutorial.
Pages and Routing in Next.js
In this section, you’ll learn how to create components and pages in Next.js and how to navigate between them. Pages in Next.js are React components, and Next.js provides a Link component and a useRouter hook that enables easy navigation from one page to another. You’ll learn more about them shortly.
Pages vs Components
In Next.js, pages are components created using familiar React syntax to define routes within the application. However, not every component is a page. Components are reusable UI elements that render data on a page.
Let’s look at the difference between them:
For instance, within the newly created Next.js app folder, the page.tsx file represents the application’s home page and the layout.tsx file contains the page metadata, allowing you to select a font type and update the page’s title.
import type { Metadata } from "next";
import { Inter } from "next/font/google";
import "./globals.css";
const inter = Inter({ subsets: ["latin"] });
export const metadata: Metadata = {
    title: "Create Next App",
    description: "Generated by create next app",
};
export default function RootLayout({
    children,
}: Readonly<{
    children: React.ReactNode;
}>) {
    return (
        <html lang='en'>
            <body className={inter.className}>{children}</body>
        </html>
    )
}
The code snippet above is an overview of the layout.tsx file. It sets the page’s title, font, and description.
Additionally, when you need to create multiple pages with different page titles and descriptions, you’ll need to create both the page.tsx and the layout.tsx file. Otherwise, all the pages will inherit the app/layout.tsx file.
To demonstrate this, let’s add a Dashboard page to the application. Create a dashboard folder containing a page.tsx file within the Next.js app folder.
cd app
mkdir dashboard && cd dashboard
touch page.tsx
Copy the code snippet below into the dashboard/page.tsx file.
export default function Home() {
    return (
        <main>
            <h2>Hello, Dashboard</h2>
        </main>
    );
}
When you visit the home and dashboard route in your browser, you’ll notice that both pages inherit the app/layout.tsx file until you create the layout.tsx file for the dashboard page.

Components, on the other hand, do not require a layout.tsx file. They are simply React components that can be imported into any page to represent a UI element or a specific part of the page.
Linking between Pages
Navigating between pages in Next.js is very easy and efficient. Next.js provides a Link component that allows users to move from one page to another and a useRouter hook that enables users to go back and forth between the application pages.
Here is how to use the Link component:
import Link from "next/link";
export default function Page() {
    return (
        <main>
            <Link href='/home'>Go Home</Link>
        </main>
    );
}
The Link component accepts the page route as the href attribute and wraps around the text that links a page to another page.
The useRouter hook is used when you need to execute some particular functions before navigating to another page or when a user performs an action, such as a button click.
import { useRouter } from "next/navigation";
export default function Page() {
    const router = useRouter();
    const handleBtnClick = () => {
        router.push("/home");
    };
    return (
        <main>
            <button onClick={handleBtnClick}>Go Home</button>
        </main>
    );
}
The code snippet above imports the useRouter hook and initializes it within the React component. The Go Home button redirects the user to the home page when the button is clicked.
Dynamic Routes
Dynamic routes refer to pages that are generated based on data passed into the component. They are used to render dynamic content when the exact segment names are unknown.
Dynamic routes are represented with square brackets, such as: [id]. For instance, when you need to create dynamic routes like page/1, page/2, etc., you’ll need to add a [id] folder within the page folder.
The [id] segment is substituted with various values depending on the available data, serving as a placeholder for page identifiers (pages/<identifier>).
In the upcoming section, you’ll learn how to create dynamic routes.
Data Fetching in Next.js
Data fetching in Next.js is quite similar to React. The React useEffect hook and other React hooks are available in Next.js, including data fetching on the server. In this section, you’ll learn the following:
- how to fetch data from an API in Next.js,
- render the data using dynamic routes, and
- create your own APIs in Next.js.
Client-side Data Fetching
Client-side data fetching uses React hooks like `useEffect` to fetch data after the initial page load. This approach is ideal for updating data on page load or when specific values (dependencies) are modified.
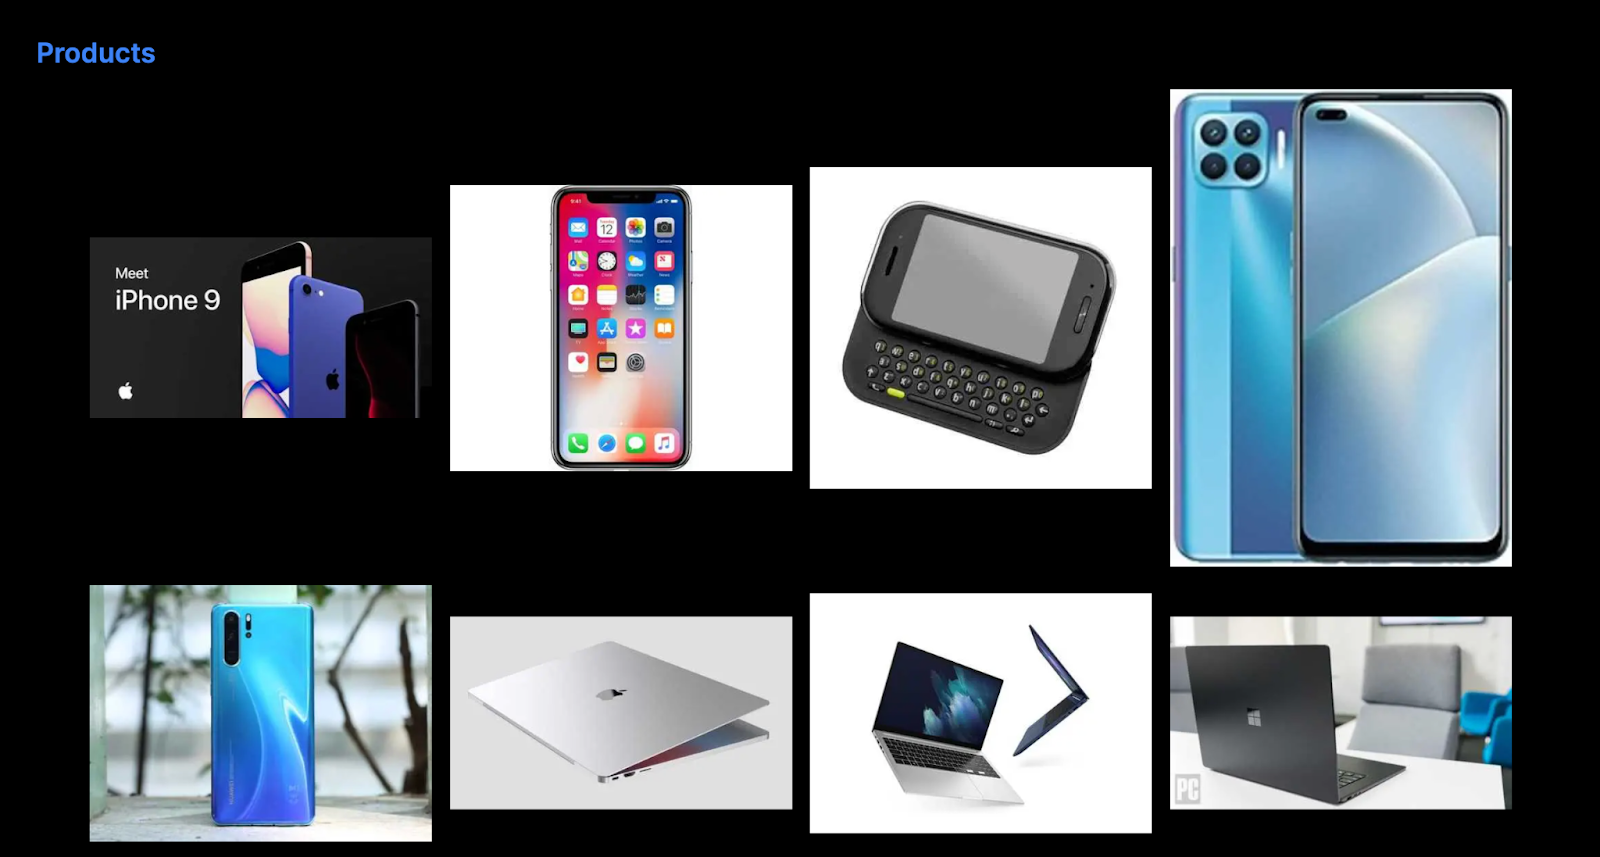
To demonstrate this, let’s create a page that renders a list of products using the DummyJSON API and a dynamic route that displays the image and title of a product.
First, add a /products client route by creating a products folder containing a page.tsx file.
cd app
mkdir products && cd products
touch page.tsx
Copy the code snippet below into the page.tsx file:
"use client";
import { useEffect, useState } from "react";
import Image from "next/image";
import Link from "next/link";
interface Product {
    id: Number;
    title: string;
    images: string[];
}
export default function Home() {
    const [productsList, setProductsList] = useState<Product[]>([]);
    useEffect(() => {
        async function fetchProducts() {
            const request = await fetch("https://dummyjson.com/products");
            const response = await request.json();
            setProductsList(response.products);
        }
        fetchProducts();
    }, []);
    return (
        <main className='p-8'>
            <h2 className='text-2xl text-blue-500 font-semibold mb-4'>Products</h2>
            <div className='w-full px-3 flex items-center gap-4 justify-center flex-wrap'>
                {productsList.map((item) => (
                    <Link href={`/products/${item.id}`} key={`${item.id}`}>
                        <Image
                            src={item.images[0]}
                            alt={item.title}
                            width={300}
                            height={300}
                        />
                    </Link>
                ))}
            </div>
        </main>
    );
}
The code snippet above fetches all the available products from the DummyJSON API endpoint on page load and renders them on the page. To use the useState and useEffect React hooks, you need to specify that the component is a client component by adding “use client” to the top of the file. You can also create images and links using the Next.js Image and Link components.
Next, you can create a dynamic page for each product using the ID attribute. Create an [id] folder containing a page.tsx file within the `products` folder and copy the code snippet below into the [id]/page.tsx file.
"use client";
import { useParams } from "next/navigation";
import { useEffect, useState } from "react";
import Image from "next/image";
export default function Page() {
    const { id } = useParams<{ id: string }>();
    const [product, setProduct] = useState<Product>({});
    const [loading, setLoading] = useState<boolean>(true);
    useEffect(() => {
        async function fetchProductDetails() {
            const request = await fetch(`https://dummyjson.com/products/${id[0]}`);
            const response = await request.json();
            setProduct(response);
            setLoading(false);
        }
        fetchProductDetails();
    }, [id]);
    if (loading) return <p>Loading...</p>;
    return (
        <main className='w-full min-h-[100vh] flex flex-col justify-center items-center p-6'>
            <Image
                src={product?.images[0]}
                alt={product?.title}
                width={500}
                height={500}
                className='mb-4'
            />
            <h3 className='text-semibold text-xl '>{product?.title}</h3>
        </main>
    );
}
Fetching data on the server
Next.js allows you to fetch data on the server using the native Fetch Web API, making it faster to retrieve data from API endpoints. Unlike client-side data fetching, you don’t need to add a loading state because the data is cached by default and made available as soon as the page loads.
Let’s update the products page to fetch all the products on the server before rendering them within the React component.
import Image from "next/image";
import Link from "next/link";
async function getProducts() {
    const res = await fetch("https://dummyjson.com/products");
    if (!res.ok) {
        throw new Error("Failed to fetch data");
    }
    return res.json();
}
export default async function Home() {
    const { products } = await getProducts();
    return (
        <main className='p-8'>
            <h2 className='text-2xl text-blue-500 font-semibold mb-4'>Products</h2>
            <div className='w-full px-3 flex items-center gap-4 justify-center flex-wrap'>
                {products.map((item: Product) => (
                    <Link href={`/products/${item.id}`} key={`${item.id}`}>
                        <Image
                            src={item.images[0]}
                            alt={item.title}
                            width={300}
                            height={300}
                        />
                    </Link>
                ))}
            </div>
        </main>
    );
}
The getProducts function runs on the server to fetch all the available products from the endpoint and return them. It also caches the result to improve the page load time.
The React component is an asynchronous function. It retrieves the products from the getProducts function and displays them on the page.
Creating API routes in Next.js
In addition to creating page routes, Next.js allows you to create API routes that can accept, modify, and return data via API calls. These API endpoints are declared within an api directory.
To create a /api/products endpoint, you need to add a products folder containing a route.ts file within the api folder.
The route.ts file contains route handlers that process various HTTP request methods, such as GET, POST, PUT, and DELETE. This simplifies server-side logic and allows us to build full-featured APIs.
For example, let’s fetch all the products from the DummyJSON API endpoint on the server and retrieve them from the Next.js API endpoint. Create a route.ts file within the api/products folder and copy the code snippet below into the file:
export async function GET() {
    const res = await fetch("https://dummyjson.com/products");
    const data = await res.json();
    return Response.json({ data });
}
The code snippet above creates an endpoint that retrieves the products from the DummyJSON API, enabling us to fetch the data from the Next.js /api/products endpoint.

Styling Next.js applications
Next.js gives you flexibility on how to style your web applications. It recommends Tailwind CSS during its installation process. However, you can use your preferred UI library or framework provided it supports Next.js or has a Next.js installation guide.
Tailwind CSS
Tailwind CSS is a utility-first CSS framework that enables you to build modern and fully responsive user interfaces. Next.js recommends Tailwind CSS during installation, so you don’t need to perform any extra configurations – just select Tailwind CSS when creating the Next.js project. Unlike traditional CSS frameworks that offer predefined UI components, Tailwind provides low-level utility classes, allowing you to create your designs directly from scratch.
CSS Modules
Next.js also provides built-in support for CSS modules. CSS Modules allow you to create CSS files that are local to specific components to avoid class name conflicts and make it easier to maintain and understand the component styles. In CSS Modules, each file is treated as a module, and class names are automatically scoped to a specific component.
For instance, you can create a styles.module.css file containing the styling below:
.container {
    background-color: #f0f0f0;
    padding: 20px;
    border-radius: 5px;
}
.title {
    font-size: 24px;
    color: #333;
}
Then, import the CSS file into the needed component, as shown below.
import styles from "./styles.module.css";
export default function Component() {
    return (
        <div className={styles.container}>
            <h1 className={styles.title}>Hello, Next.js!</h1>
        </div>
    );
}
Other Styling alternatives
Next.js supports various styling and UI components libraries some of which are: Chakra UI, Sass, Less, MUI library, Shadcn, and Styled Components.
- Chakra UI is a modern React component library that provides a set of accessible, reusable, and composable components, enabling you to build modern and accessible web applications.
- Material UI library (MUI) is a popular React UI framework that implements Google’s Material Design principles, offering a wide range of pre-styled components.
- Shadcn is a collection of reusable and beautifully designed components that can be copied easily into your applications. Styled Components is a CSS-in-JS library that allows you to style React components by writing actual CSS code within JavaScript template literals.
Less and Sass are CSS preprocessors that add features like variables, nested rules, and mixins to CSS.
User Auth and Database Management in Next.js
Next.js supports multiple backend services and tools that allow you to authenticate users, manage user sessions, perform CRUD operations, and manage real-time database requests to build full-stack and secured web applications.
In this section, you’ll learn how to leverage these services to build highly functional web applications.
Neon Postgres Database
Neon is a fully managed serverless Postgres database with a generous free tier. Neon separates storage and compute, and offers modern developer features such as serverless, branching, bottomless storage, and more. Neon is open source and written in Rust.

Neon brings the serverless experience to Postgres. Developers can build faster and scale their products effortlessly, without the need to dedicate big teams or big budgets to the database.
Recently, I wrote a complete guide about how to build a blog app with Neon Postgres, Clerk and Next.js, feel free to check it out.
Firebase
Firebase is a Backend-as-a-Service (Baas) owned by Google that enables developers to build full-stack web applications in a few minutes. Services like Firebase make it very easy for Next.js developers to build full-stack web applications with little or no backend programming skills.

Firebase provides various authentication methods, a NoSQL database, a real-time database, file storage, cloud functions, hosting services, and many more.
Recently, I wrote a complete how-to guide about how you can build a blog using Next.js and Firebase, feel free to check it out.
Supabase
Supabase is an open-source Firebase alternative that enables you to create secured and scalable software applications.
It provides a secured Postgres database, a complete user management system that handles various forms of authentication (including email and password, email sign-in, and social authentication), a file storage system that lets you store and serve files of any size, real-time communication, and many other features.

I have also written a complete how-to guide about how you can build a full-stack notes application with React and Supabase, feel free to check it out.
Appwrite
Appwrite is a powerful open-source backend platform that enables you to create secured and scalable (web and mobile) applications. With Appwrite, you don’t need to worry about the backend resources of your application because Appwrite is scalable and allows you to build applications with zero stress.

Instead of setting up your backend server on your computer, Appwrite Cloud enables you to focus on developing your applications; while, it manages crucial backend functionalities such as user authentication, database management, file storage, and more.
Recently, I wrote a complete guide about how to build a secure task manager app with Next.js and Appwrite, feel free to check it out.
Other authentication services
Next.js also supports numerous authentication tools such as NexAuth – an open-source, flexible authentication service for Next.js applications, Clerk – a complete user management platform that provides easy-to-use authentication UIs, flexible APIs, and admin dashboards, and Hanko – an open-source authentication and user management.
Next.js is flexible. It gives you complete control and enables you to use any service of your choice without any limitations. This empowers you to tailor your authentication flow depending on your application’s requirements and preferred development tools.
Deploying Next.js applications
Next.js applications can be deployed to various hosting providers, such as Vercel, AWS, Netlify, and many others. The most popular free hosting platform for Next.js applications is Vercel.
Vercel’s Frontend Cloud allows you to connect your code repositories to your account and deploy Next.js easily at no cost.

After developing your application, run the code snippet below to build all the files:
npm run buildFinally, you can run `npm run start` to preview the build version of the Next.js project within your browser.
The Next.js team is working tirelessly to churn out new improvements that improve application development and user experiences.
Other interesting Next.js features you should check out includes:
Conclusion
So far, you’ve learned what Next.js is, why you should use it, how to create your first app, data fetching, styling, and deployment of Next.js applications.
Next.js provides a lot of functionalities out of the box that help to improve the developer’s experience and user experience of your web applications.
Whether you’re creating a simple static site or a complex dynamic application, Next.js offers the tools and flexibility needed to achieve your goals.
Thank you for reading.
Don’t miss out on my latest tutorials and projects:
- How I Built a RAG Chatbot with Agentcloud and Google Sheets – Read Here
- Neon Postgres vs Supabase- An In-Depth Comparison – Read Here
- How I Built an Invoice SaaS App with Next.js, Resend, Clerk and Neon Postgres Database
- Learn Full Stack Development with Next.js, Clerk, and Neon Postgres
Thanks for Reading
I hope you learned something new today.
If you did, please share so that it reaches others as well.
You can connect with me on Twitter or subscribe to my newsletter